
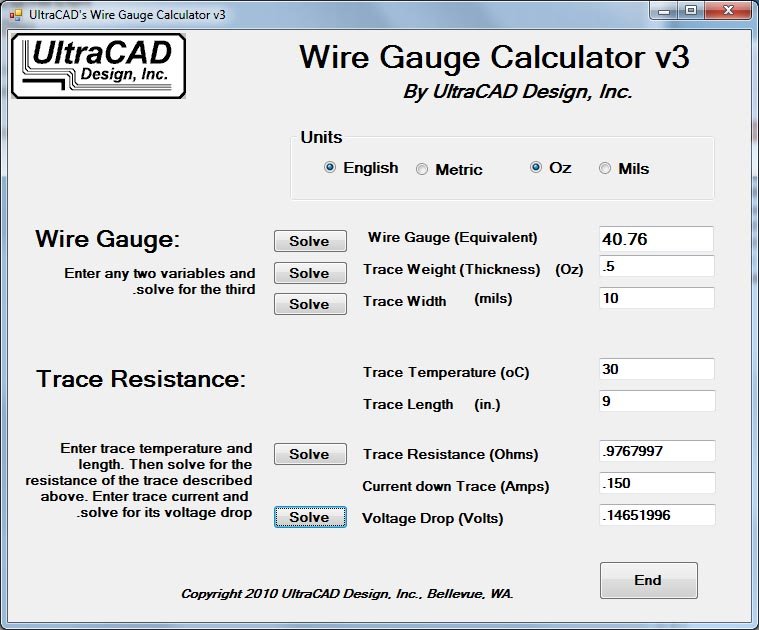
free electrical wire gauge sizing calculator engineerdog


 Amp Wiring Chart Wiring Diagram
 Ancor Marine Grade Primary Wire And Battery Cable.
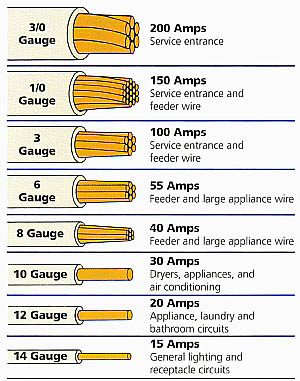
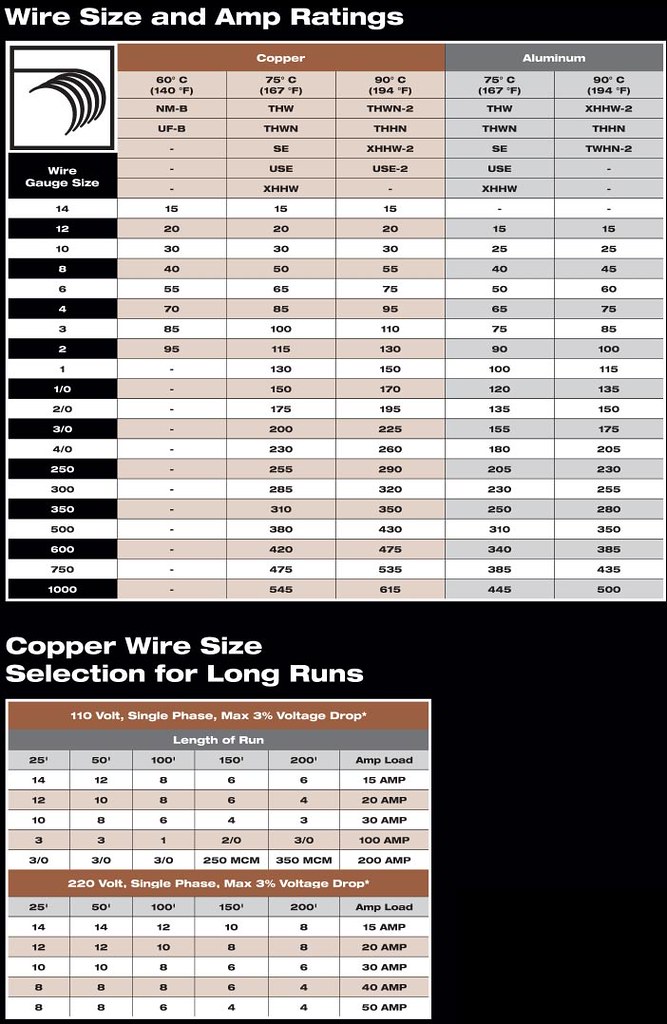
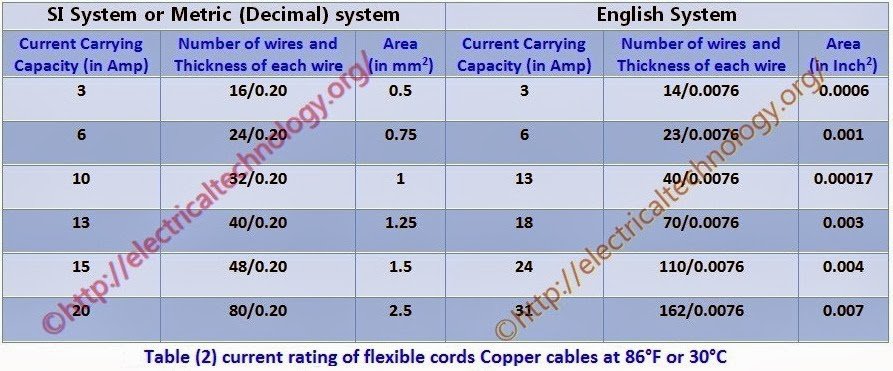
Wire Gauge Vs Amps Chart 48 Accurate Iec Ampacity Chart.
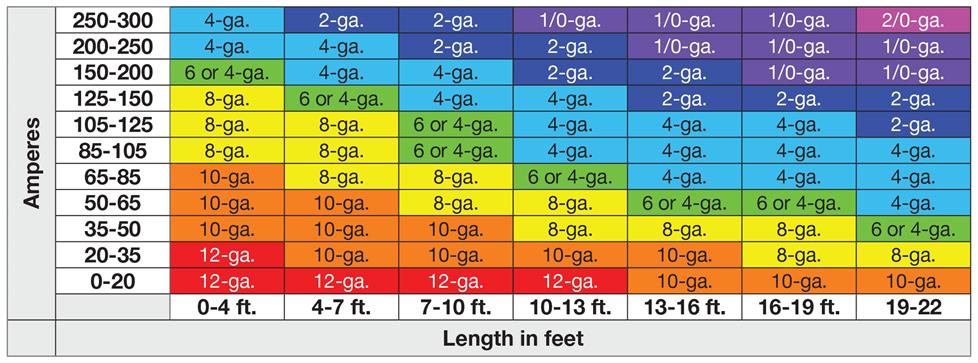
Wire Gauge Vs Amps Chart Voltage And Recommended Wire Sizes Arco.
Wire Gauge Vs Amps Chart Wiring A Home Solar Photovoltaic Pv System Page 2.
Wire Gauge Vs Amps ChartWire Gauge Vs Amps Chart Gold, White, Black, Red, Blue, Beige, Grey, Price, Rose, Orange, Purple, Green, Yellow, Cyan, Bordeaux, pink, Indigo, Brown, Silver,Electronics, Video Games, Computers, Cell Phones, Toys, Games, Apparel, Accessories, Shoes, Jewelry, Watches, Office Products, Sports & Outdoors, Sporting Goods, Baby Products, Health, Personal Care, Beauty, Home, Garden, Bed & Bath, Furniture, Tools, Hardware, Vacuums, Outdoor Living, Automotive Parts, Pet Supplies, Broadband, DSL, Books, Book Store, Magazine, Subscription, Music, CDs, DVDs, Videos,Online Shopping