
wire gauge amp wiring chart wiring diagrams
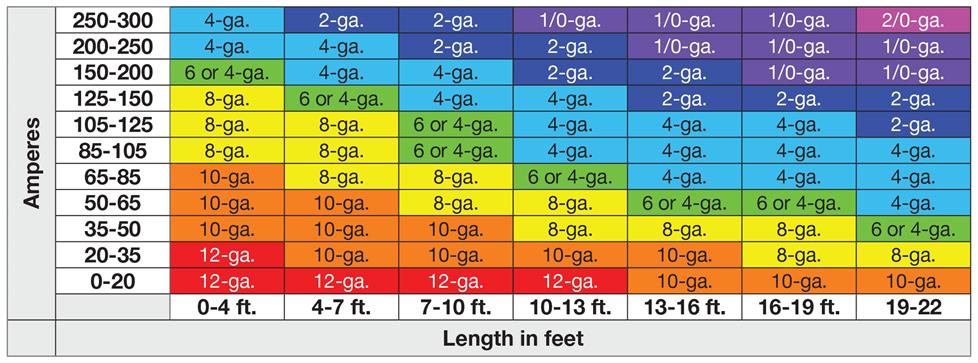


 Electrical Cable Size Chart Amps Buurtsite Net
 Wiring Ampacity Schematics Online.
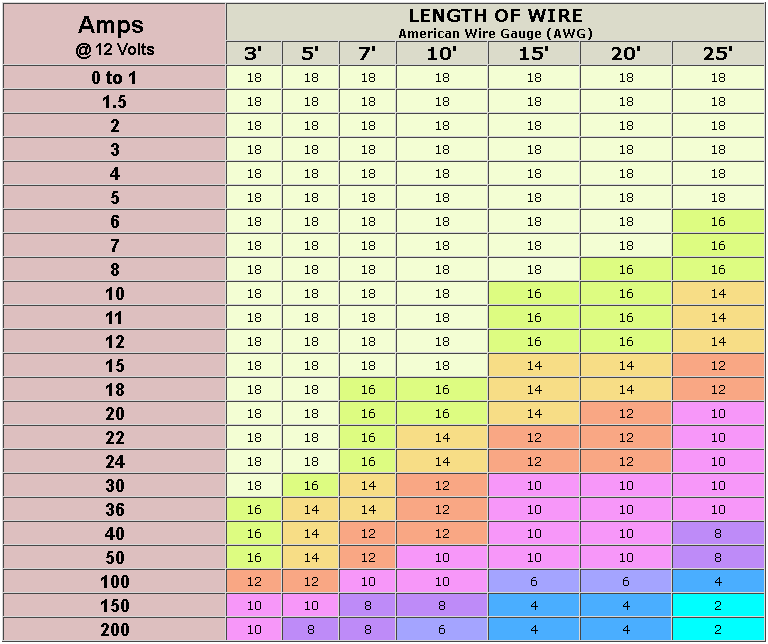
Wire Gauge Chart Amps Amp Wiring Chart Catalogue Of Schemas.
Wire Gauge Chart Amps Amp Chart For Wire Size Www Bedowntowndaytona Com.
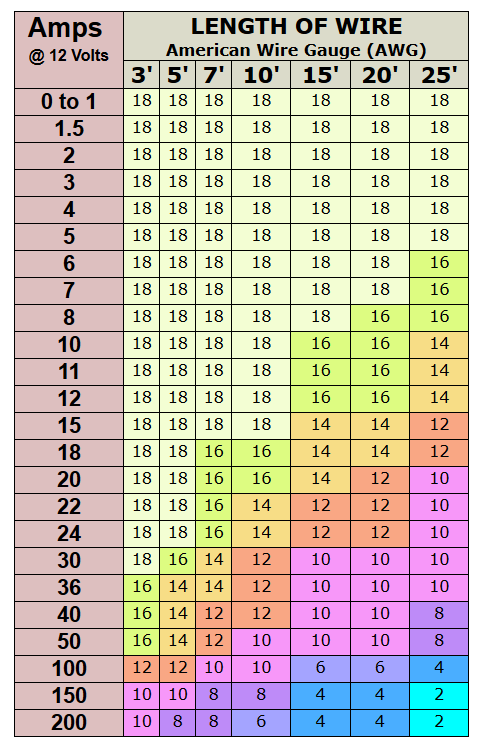
Wire Gauge Chart Amps Wire Gauge Diagram List Of Wiring Diagrams.
Wire Gauge Chart AmpsWire Gauge Chart Amps Gold, White, Black, Red, Blue, Beige, Grey, Price, Rose, Orange, Purple, Green, Yellow, Cyan, Bordeaux, pink, Indigo, Brown, Silver,Electronics, Video Games, Computers, Cell Phones, Toys, Games, Apparel, Accessories, Shoes, Jewelry, Watches, Office Products, Sports & Outdoors, Sporting Goods, Baby Products, Health, Personal Care, Beauty, Home, Garden, Bed & Bath, Furniture, Tools, Hardware, Vacuums, Outdoor Living, Automotive Parts, Pet Supplies, Broadband, DSL, Books, Book Store, Magazine, Subscription, Music, CDs, DVDs, Videos,Online Shopping