
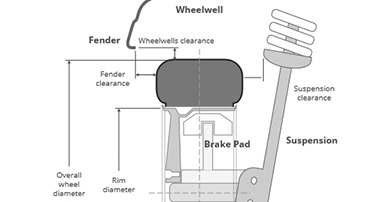
understanding wheel offset backspacing and width easy guide truck accessories explained


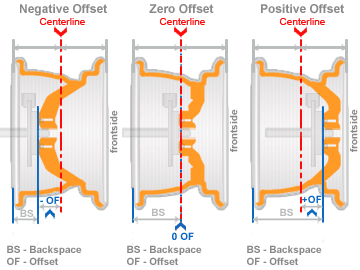


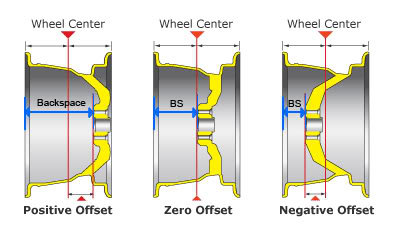


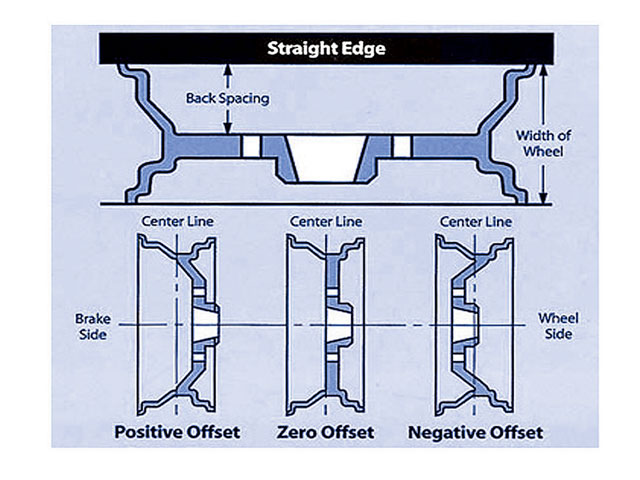


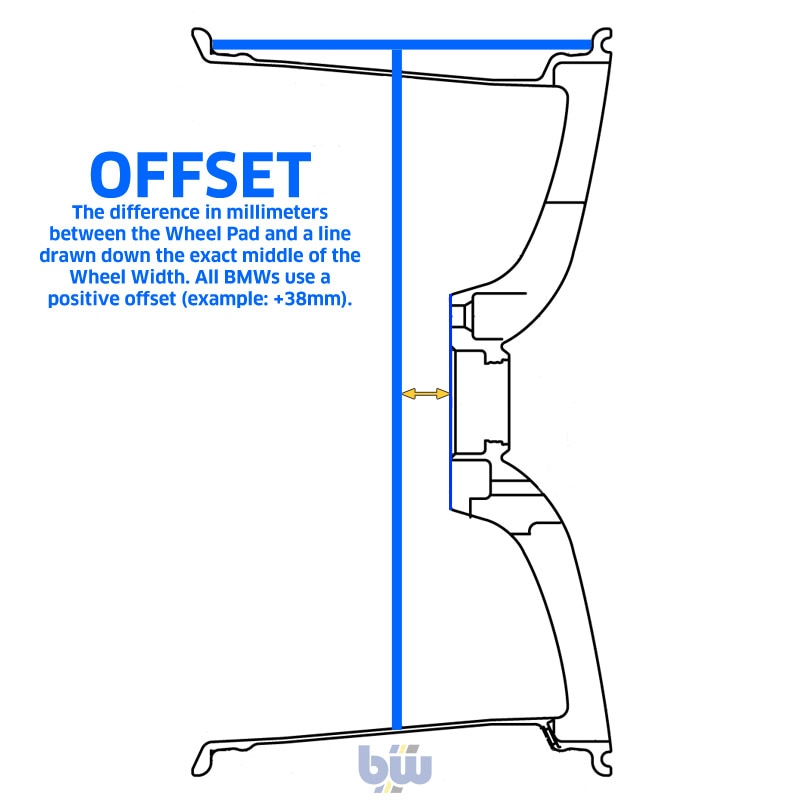
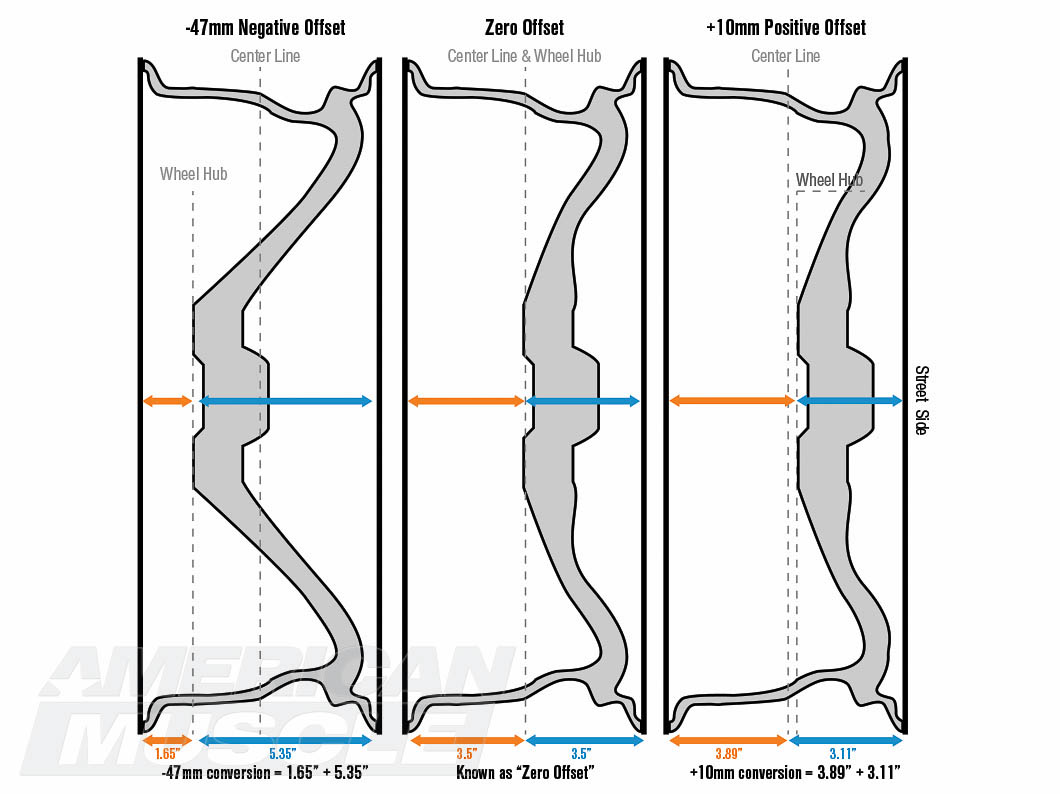


 Wheel Offset And Backspacing Explained Custom Offsets
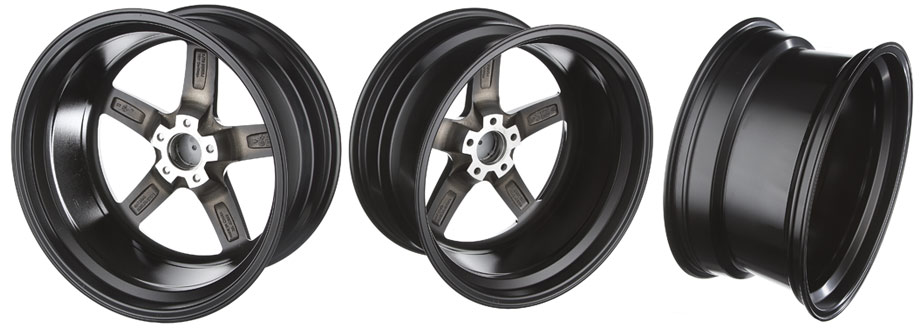
 Wheel Offset Custom Offsets Offset Rims Discount Tire.
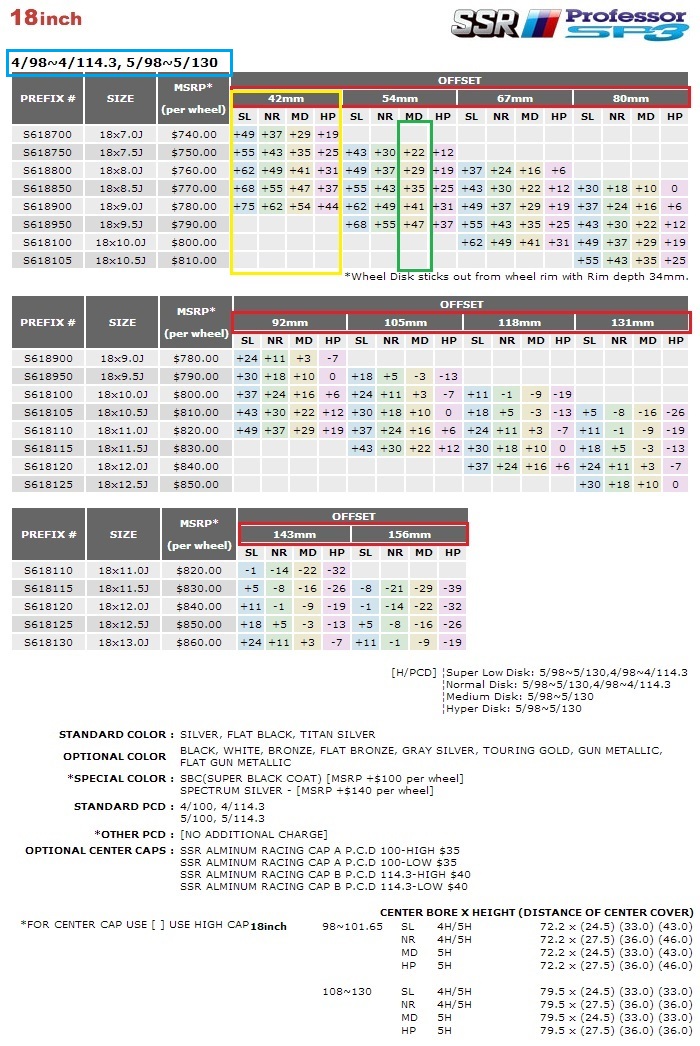
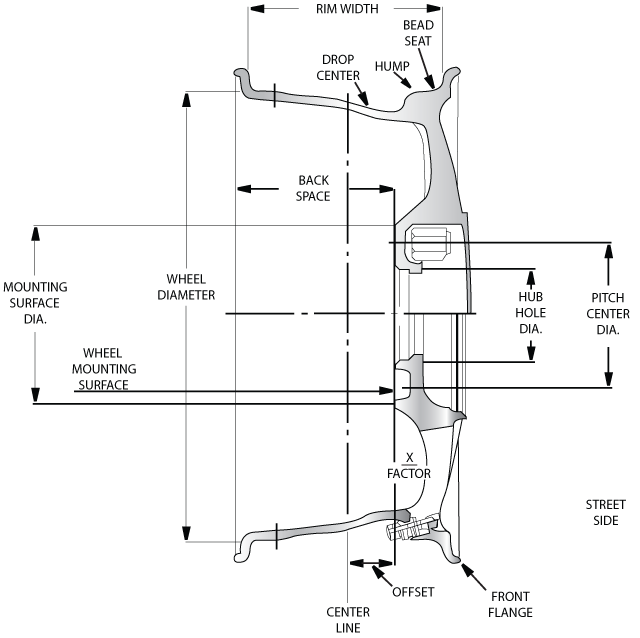
Wheel Offset Chart Toyota Wheel Offset Diagram List Of Wiring Diagrams.
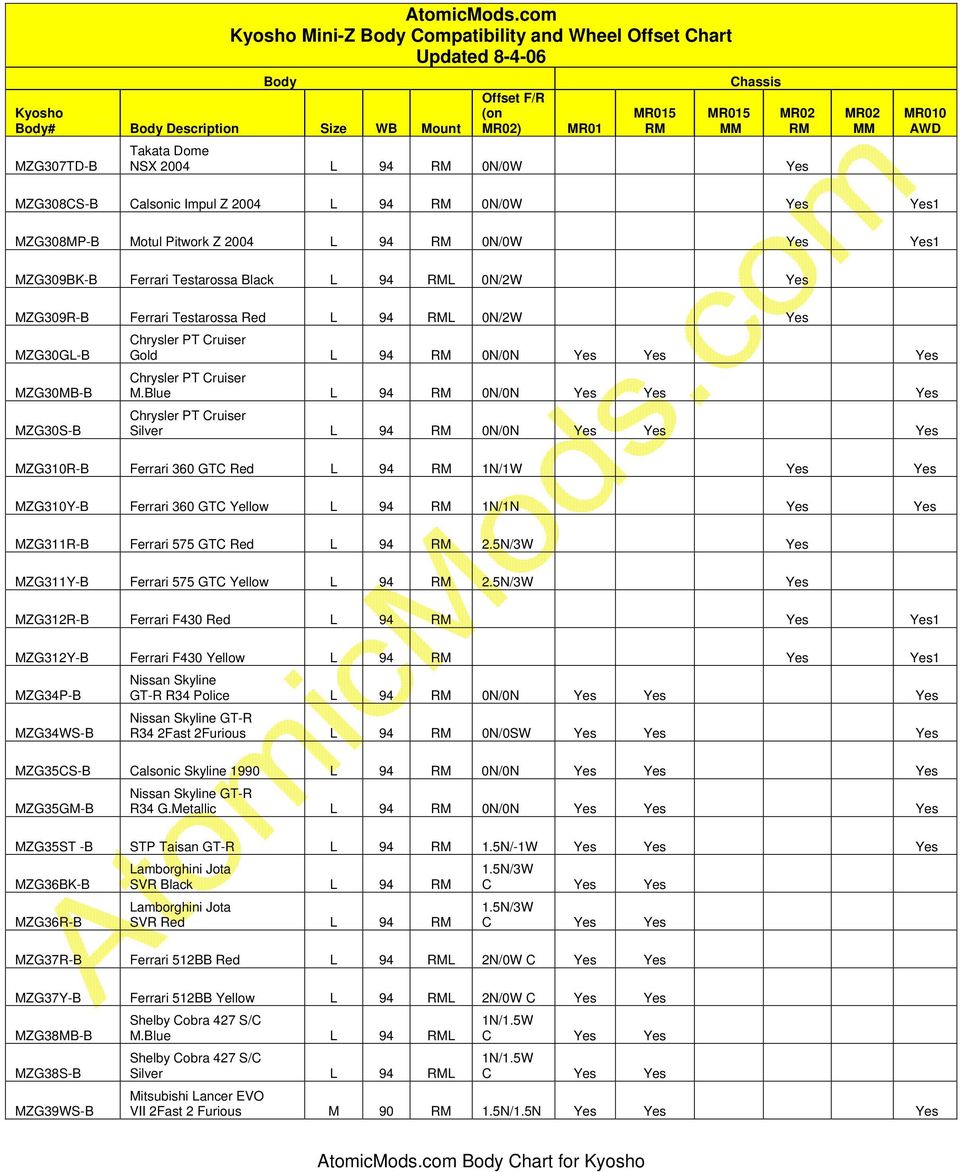
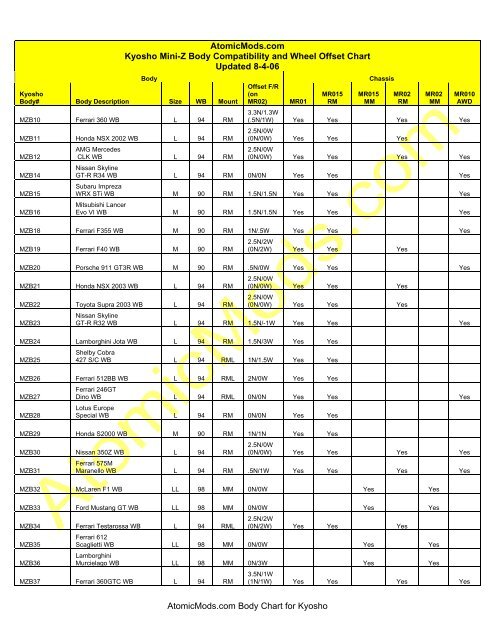
Wheel Offset Chart Toyota Atomicmods Com Body Chart For Kyosho Atomicmods Com Kyosho.
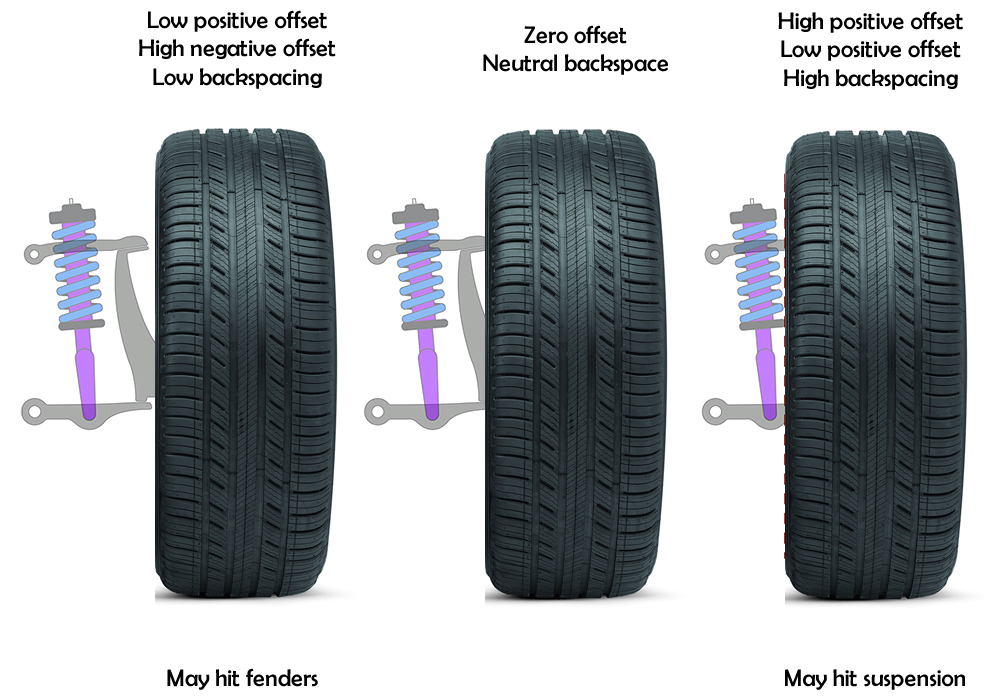
Wheel Offset Chart Toyota Alloy Wheel Offset Wheel Offset Explained.
Wheel Offset Chart ToyotaWheel Offset Chart Toyota Gold, White, Black, Red, Blue, Beige, Grey, Price, Rose, Orange, Purple, Green, Yellow, Cyan, Bordeaux, pink, Indigo, Brown, Silver,Electronics, Video Games, Computers, Cell Phones, Toys, Games, Apparel, Accessories, Shoes, Jewelry, Watches, Office Products, Sports & Outdoors, Sporting Goods, Baby Products, Health, Personal Care, Beauty, Home, Garden, Bed & Bath, Furniture, Tools, Hardware, Vacuums, Outdoor Living, Automotive Parts, Pet Supplies, Broadband, DSL, Books, Book Store, Magazine, Subscription, Music, CDs, DVDs, Videos,Online Shopping