
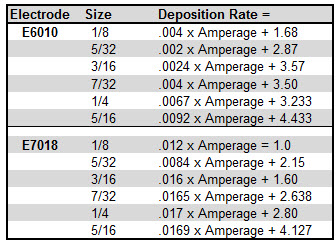
smaw welding electrode amperage chart


 Cswip 3 1 Question With Answer And Explanation Part 10
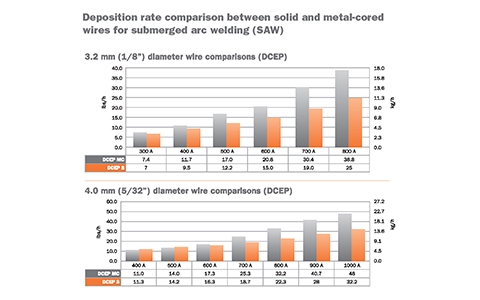
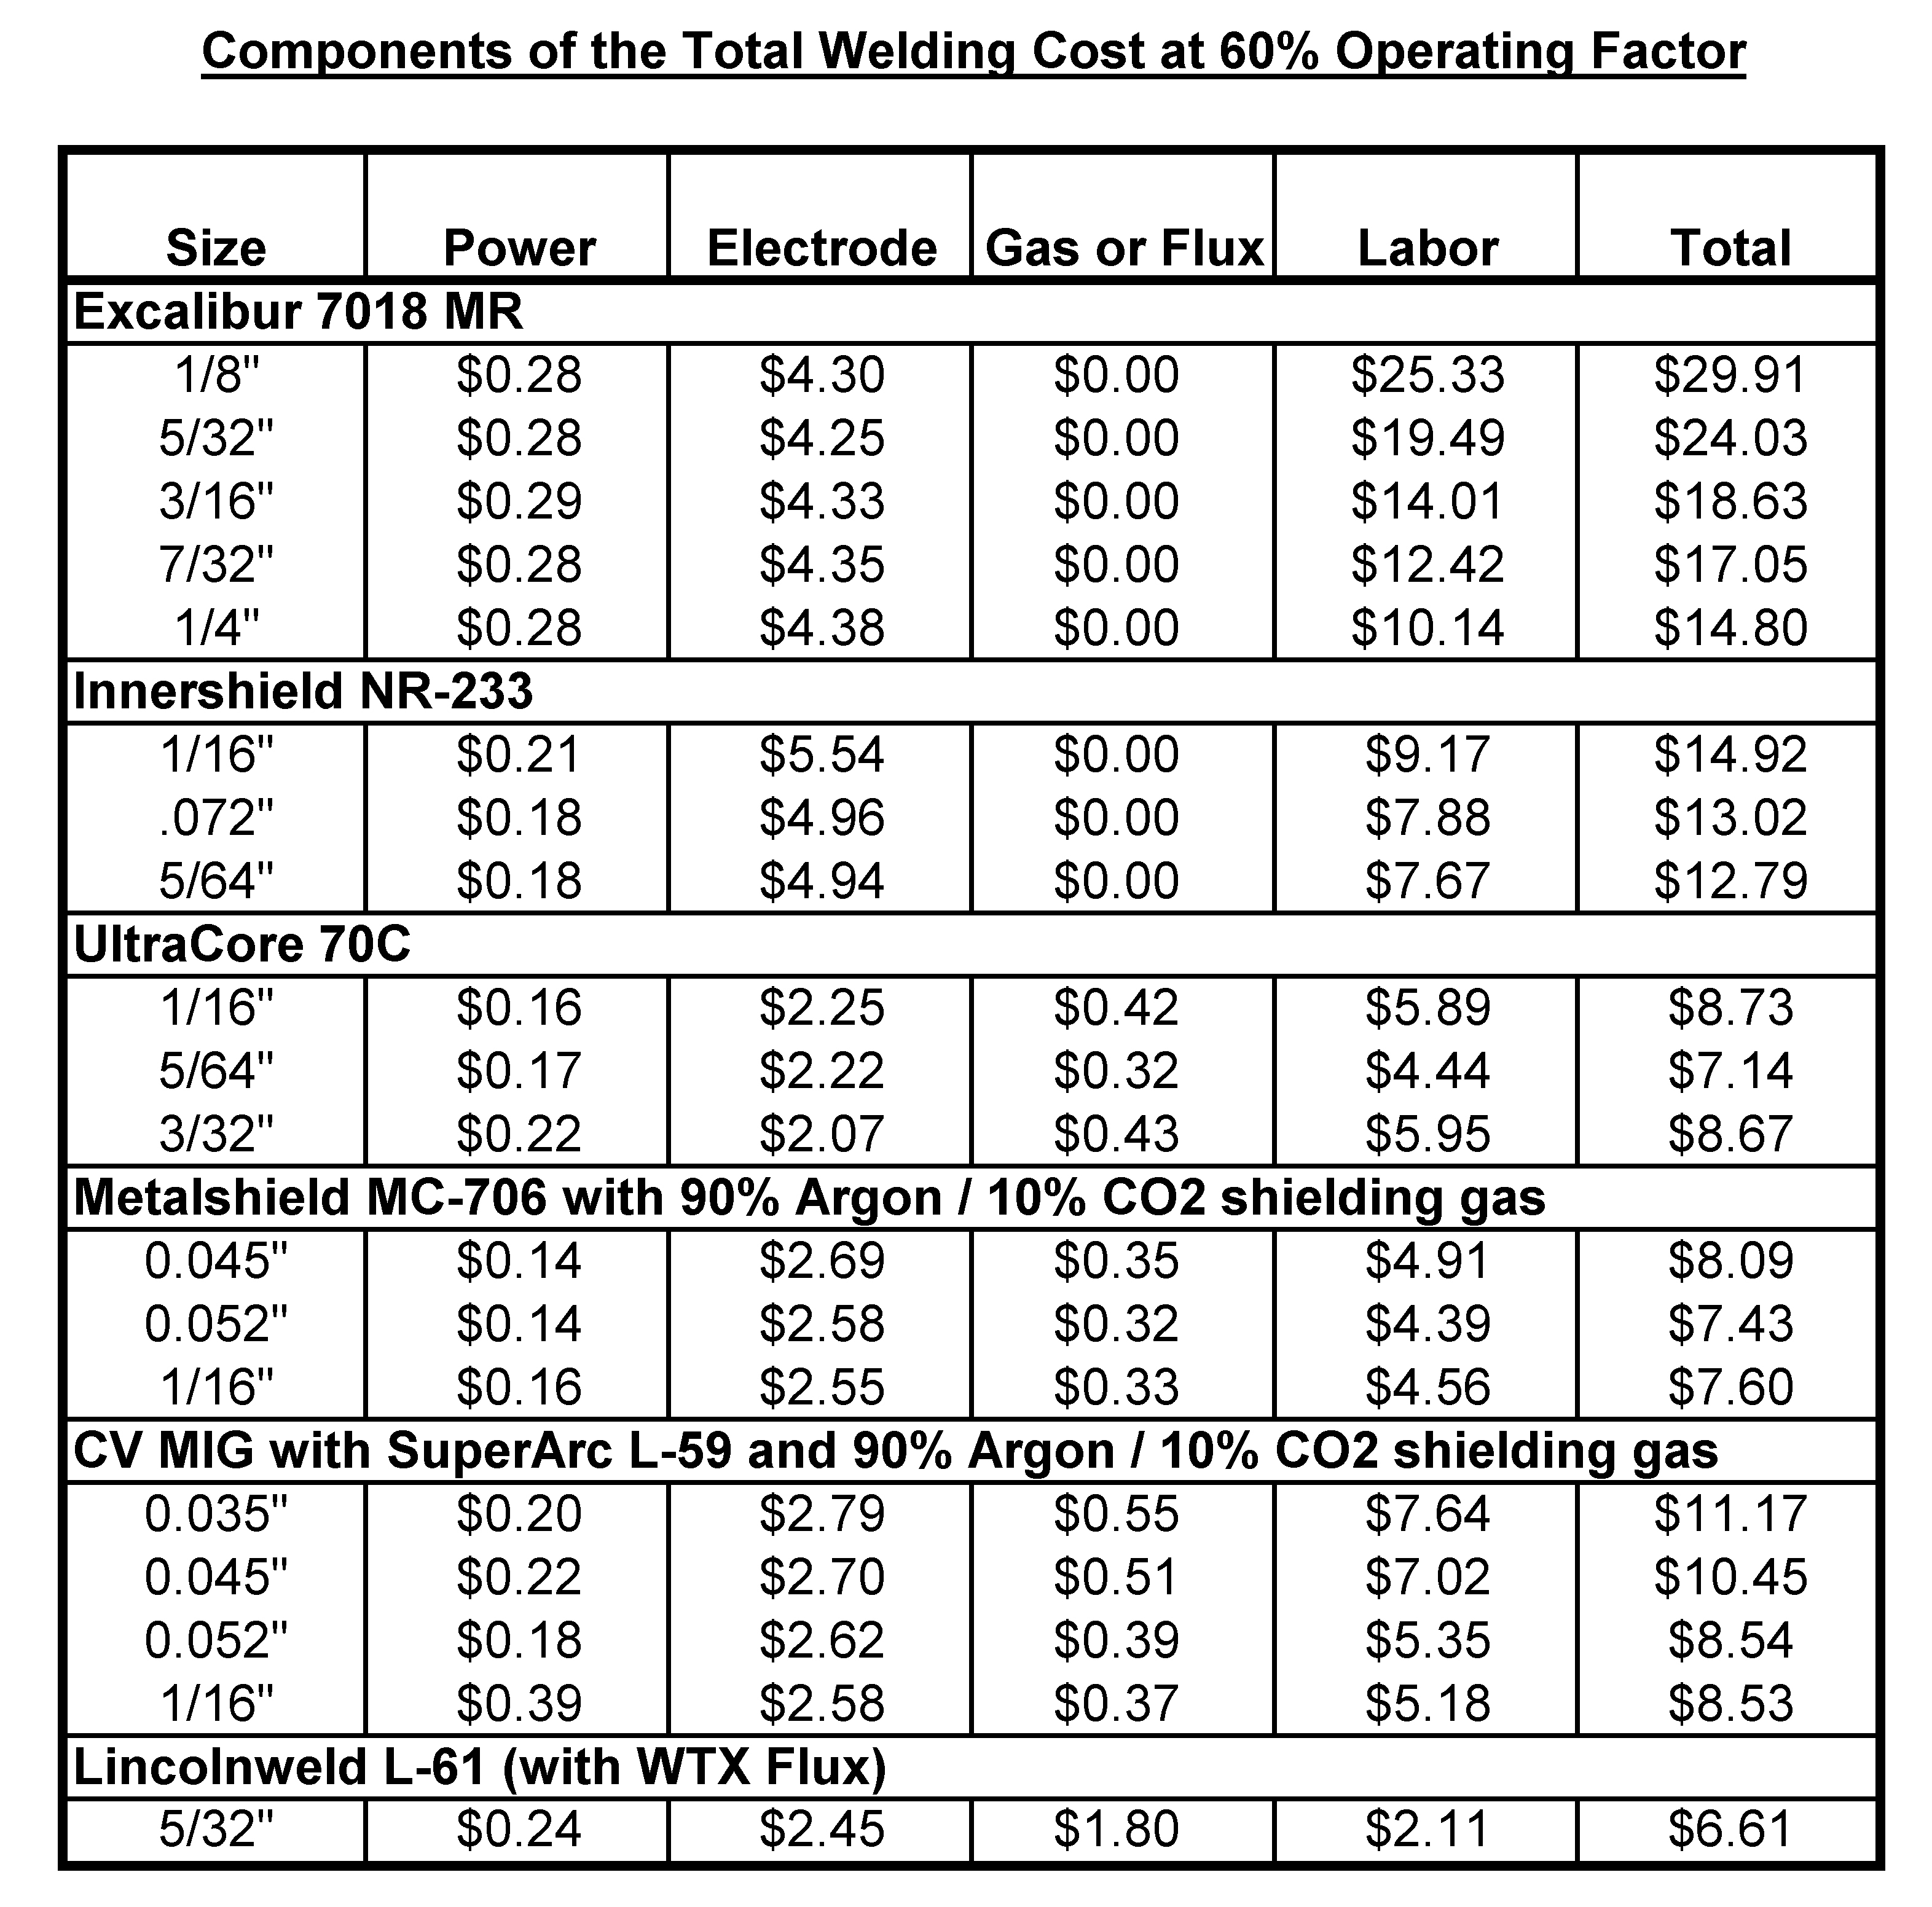
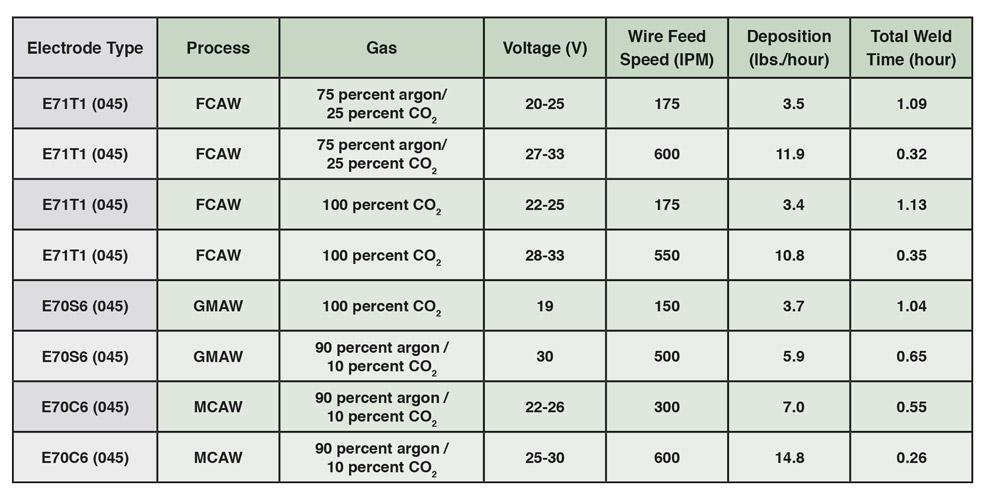
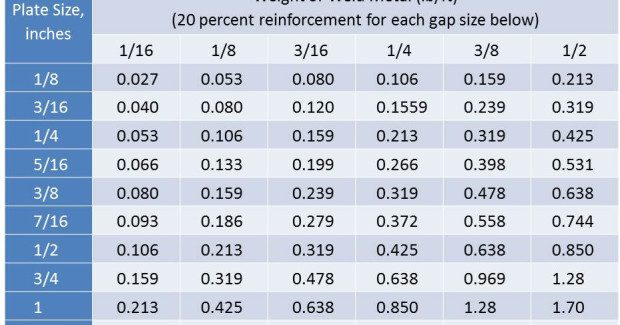
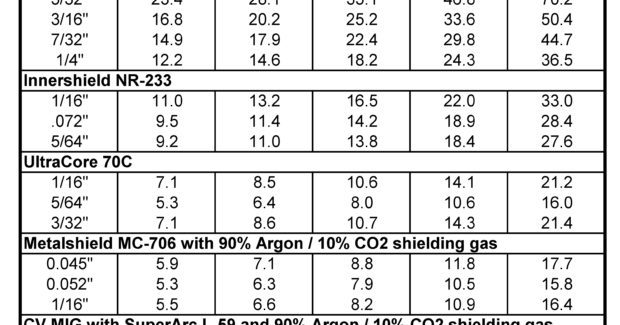
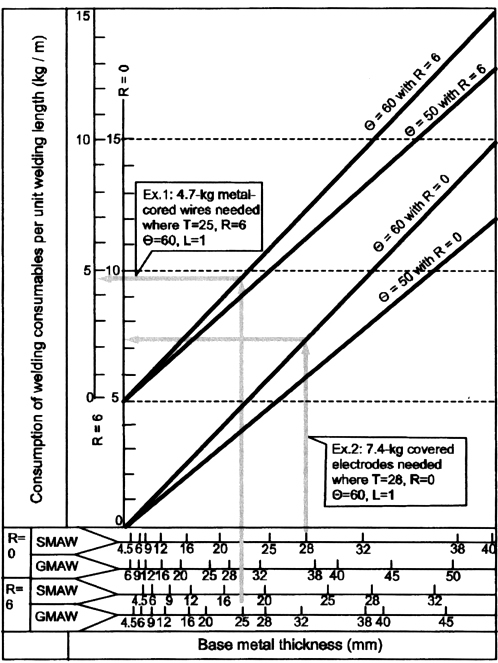
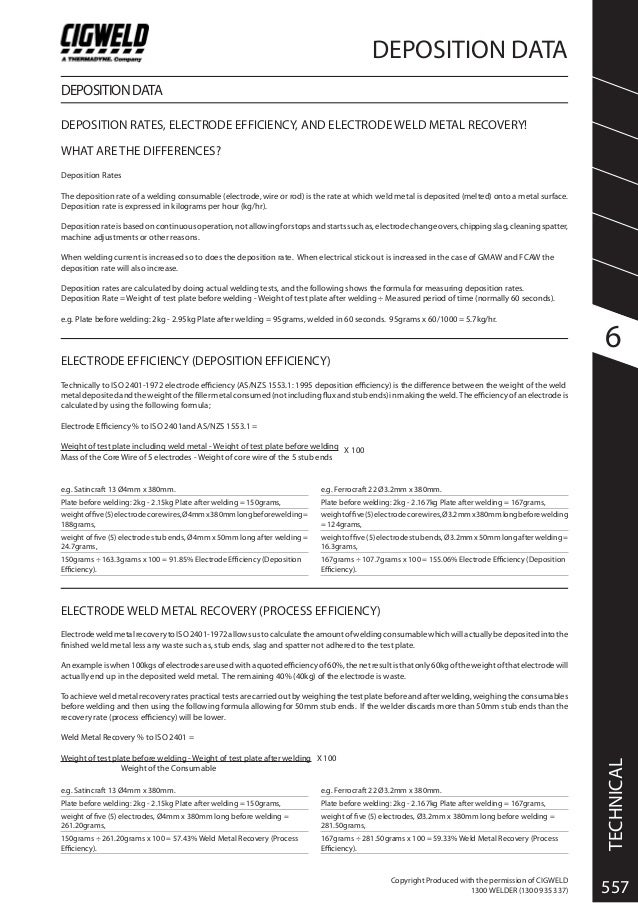
 Depositiondata.
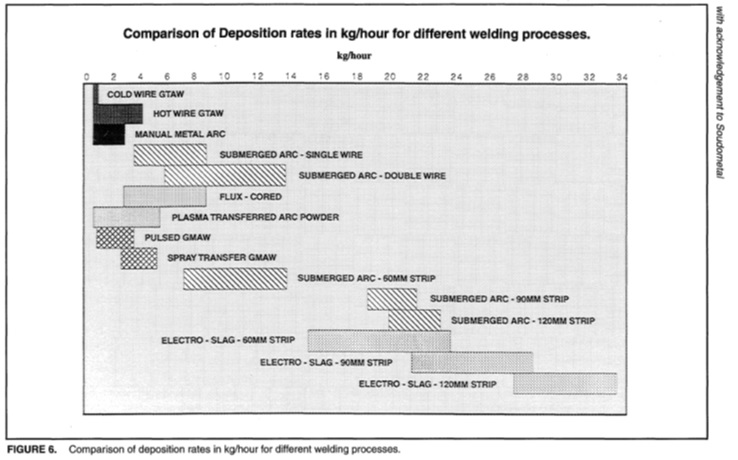
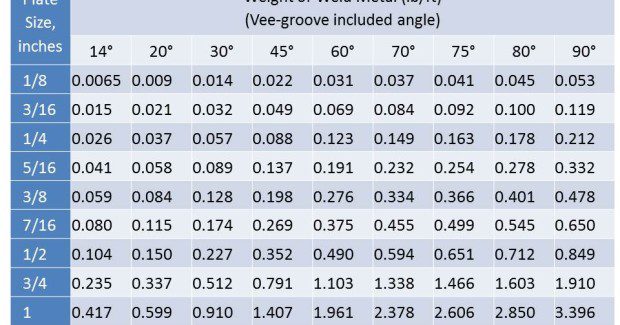
Welding Deposition Rate Chart Handbook Welding Techniques.
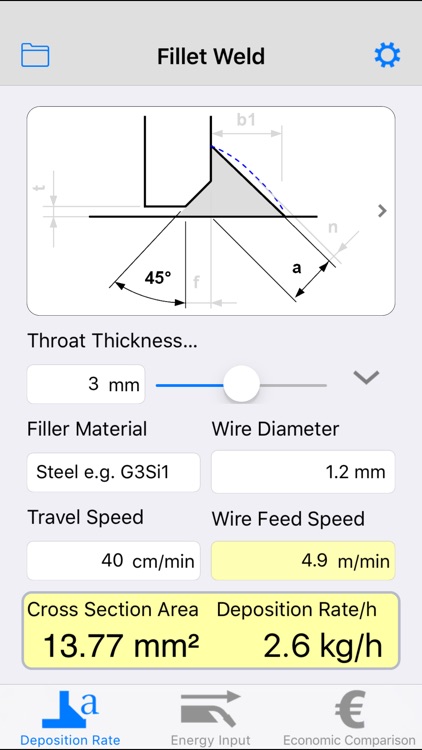
Welding Deposition Rate Chart Smaw Welding Electrode Amperage Chart Www.
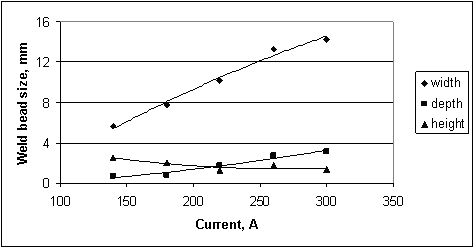
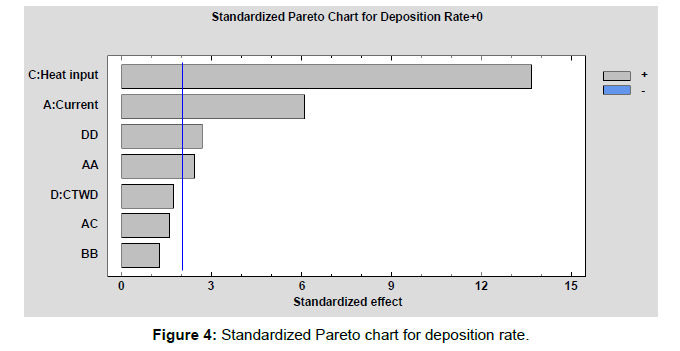
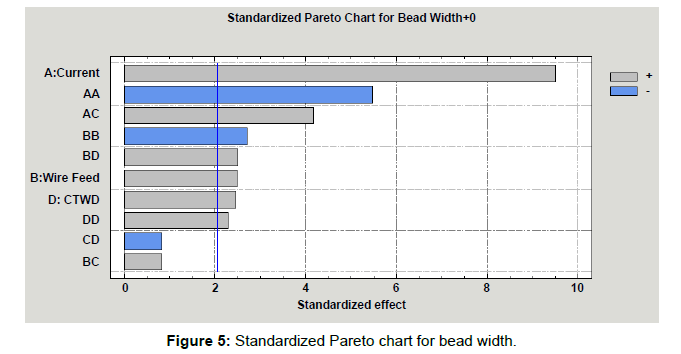
Welding Deposition Rate Chart Response Surface Methodology For Fcaw For Best Weld.
Welding Deposition Rate ChartWelding Deposition Rate Chart Gold, White, Black, Red, Blue, Beige, Grey, Price, Rose, Orange, Purple, Green, Yellow, Cyan, Bordeaux, pink, Indigo, Brown, Silver,Electronics, Video Games, Computers, Cell Phones, Toys, Games, Apparel, Accessories, Shoes, Jewelry, Watches, Office Products, Sports & Outdoors, Sporting Goods, Baby Products, Health, Personal Care, Beauty, Home, Garden, Bed & Bath, Furniture, Tools, Hardware, Vacuums, Outdoor Living, Automotive Parts, Pet Supplies, Broadband, DSL, Books, Book Store, Magazine, Subscription, Music, CDs, DVDs, Videos,Online Shopping