
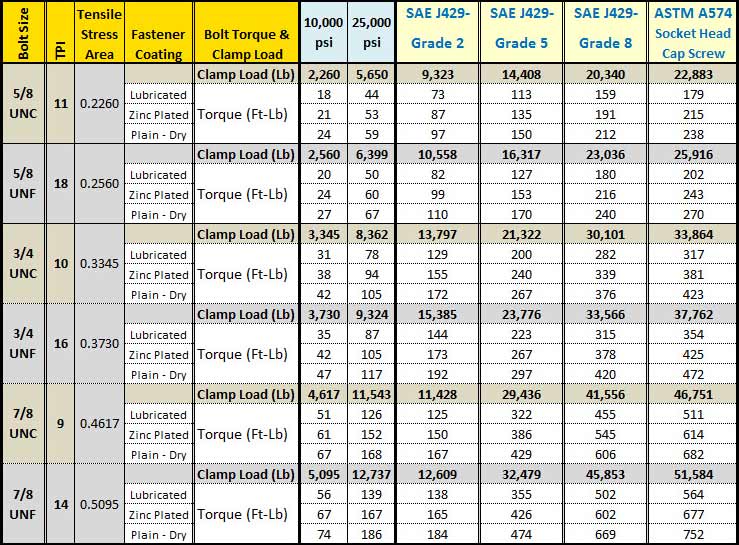
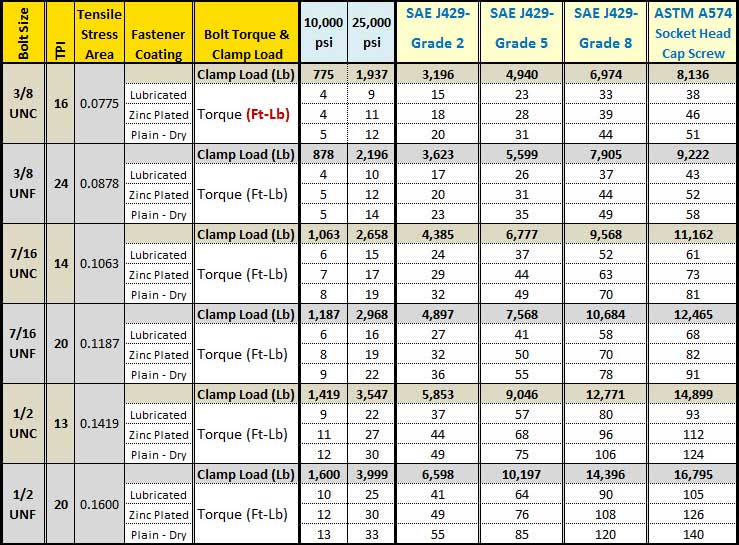
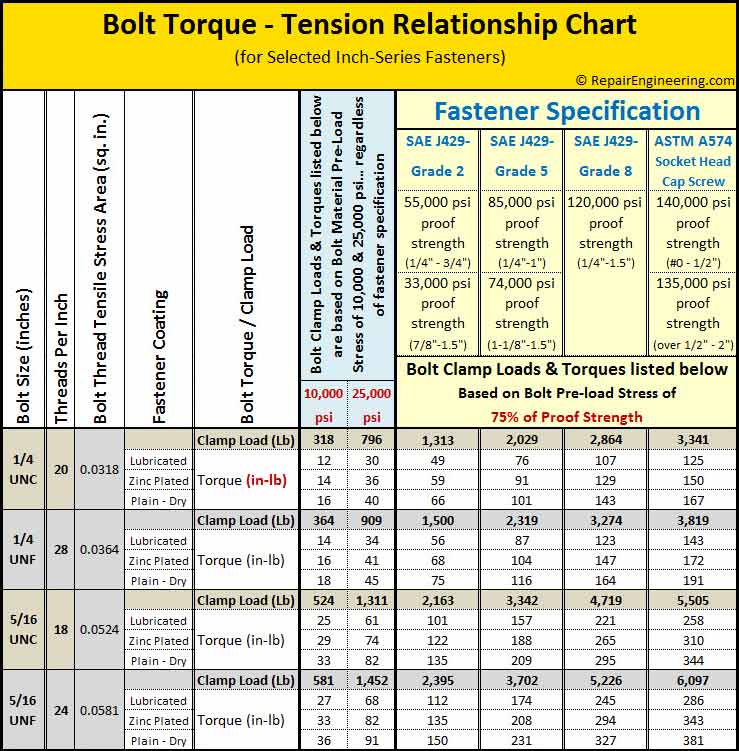
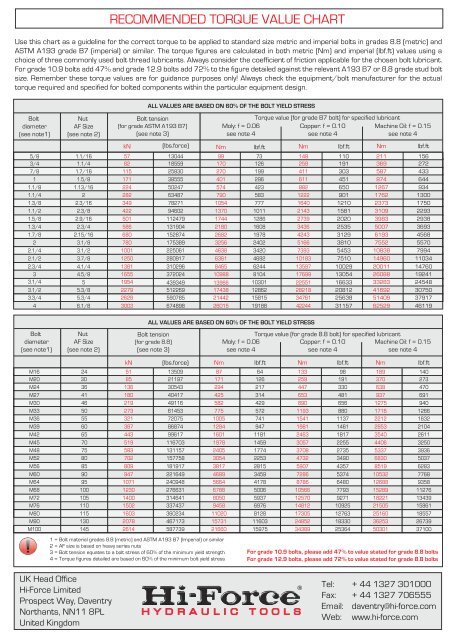
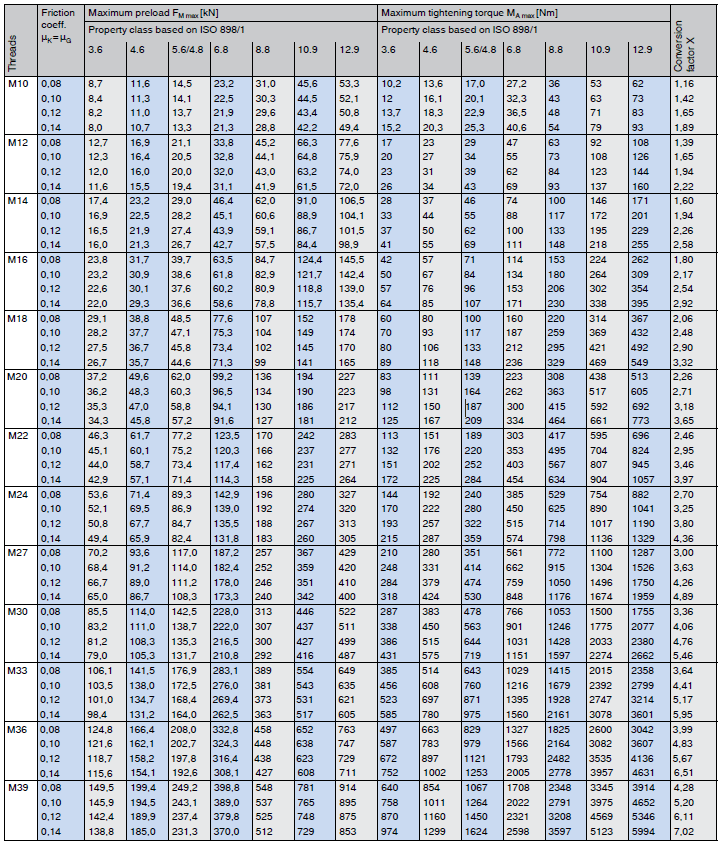
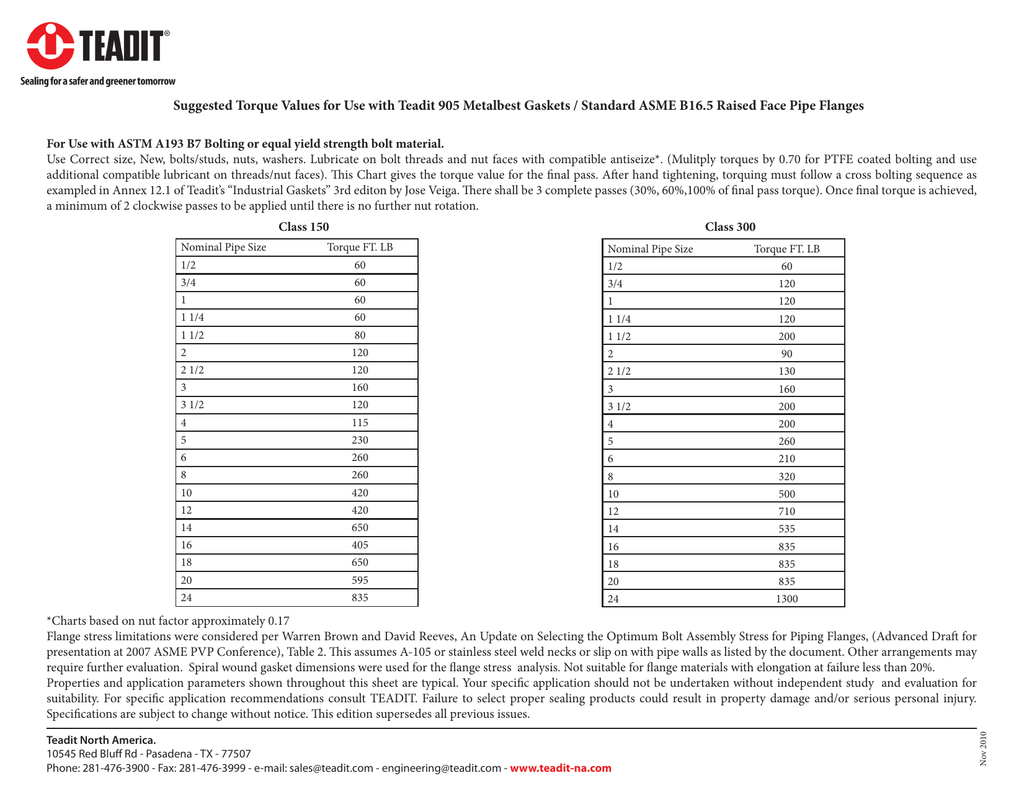
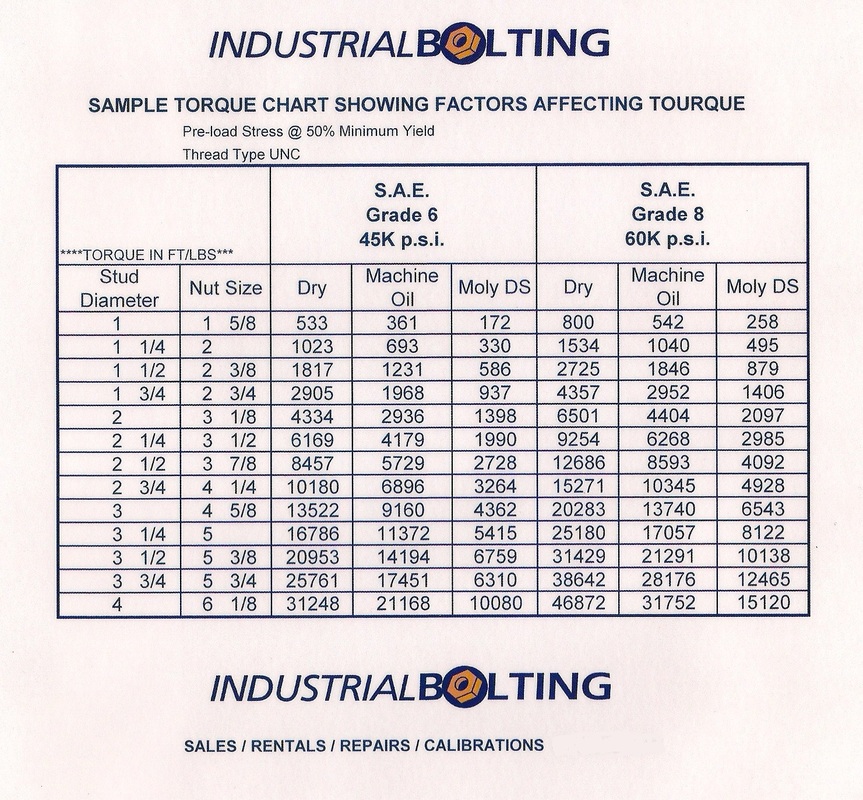
stainless steel stud bolt torque chart torque values


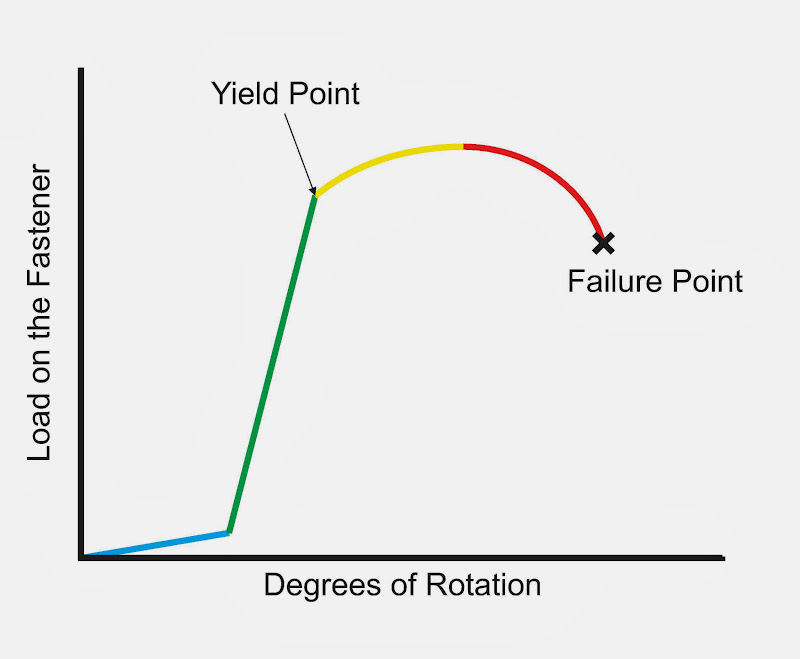


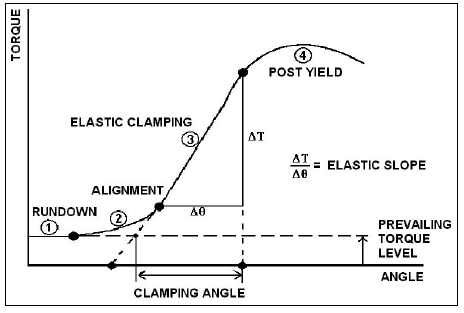


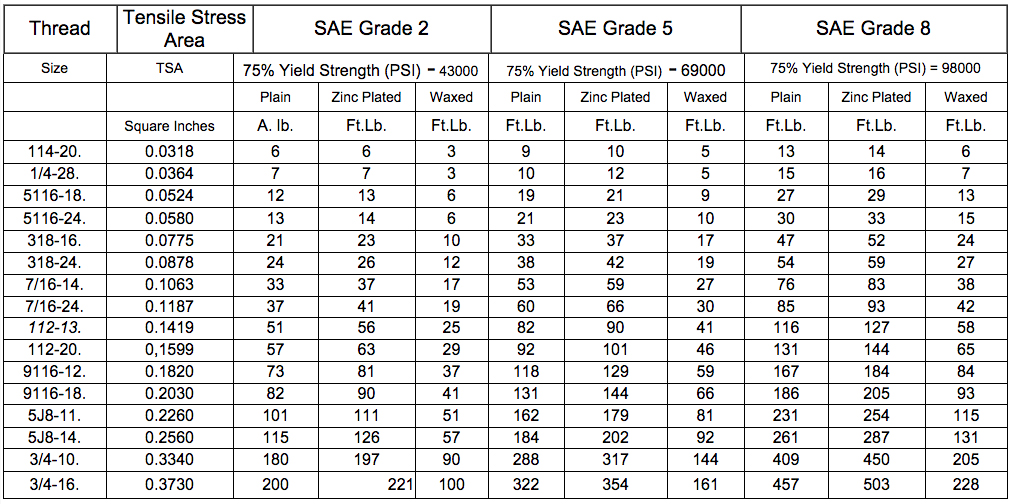


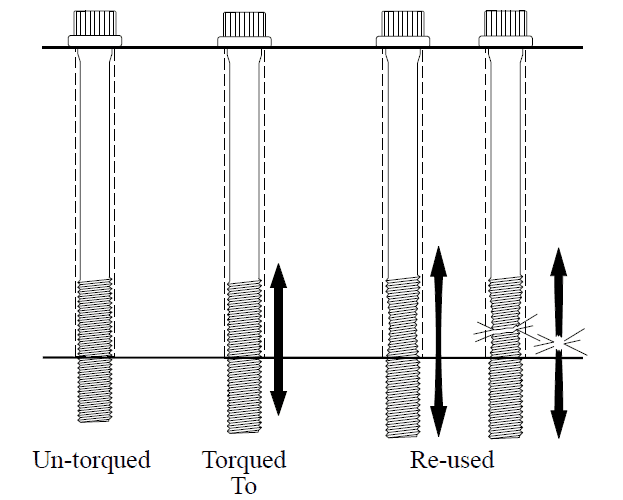

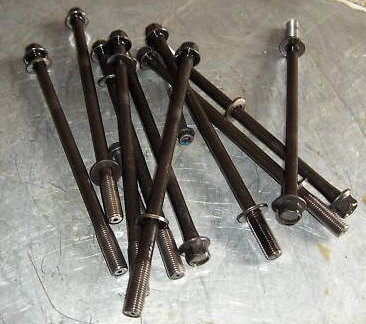


 Torque To Angle Yield Threaded Fasteners
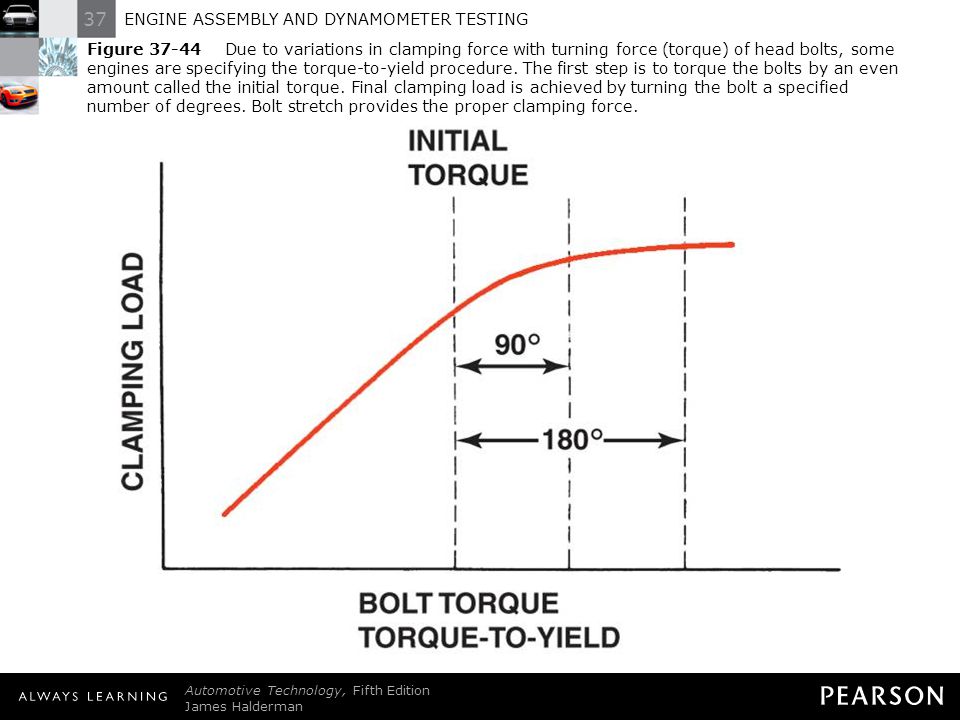
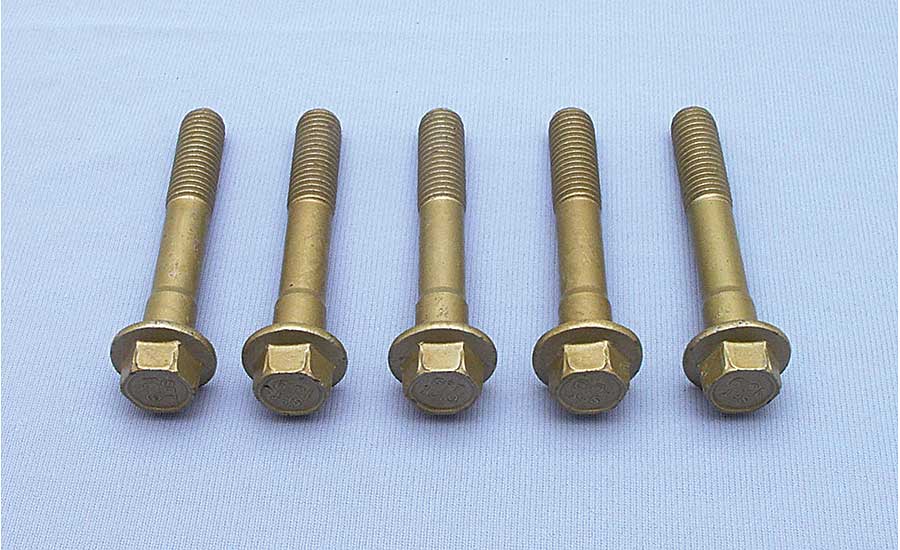
 Tty Bolt Specification Installation Fel Pro Gaskets.
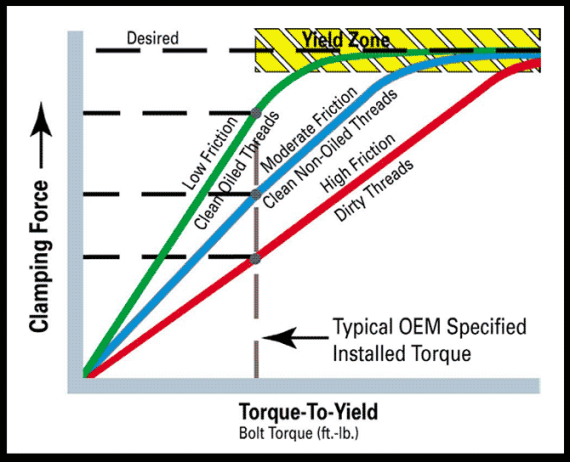
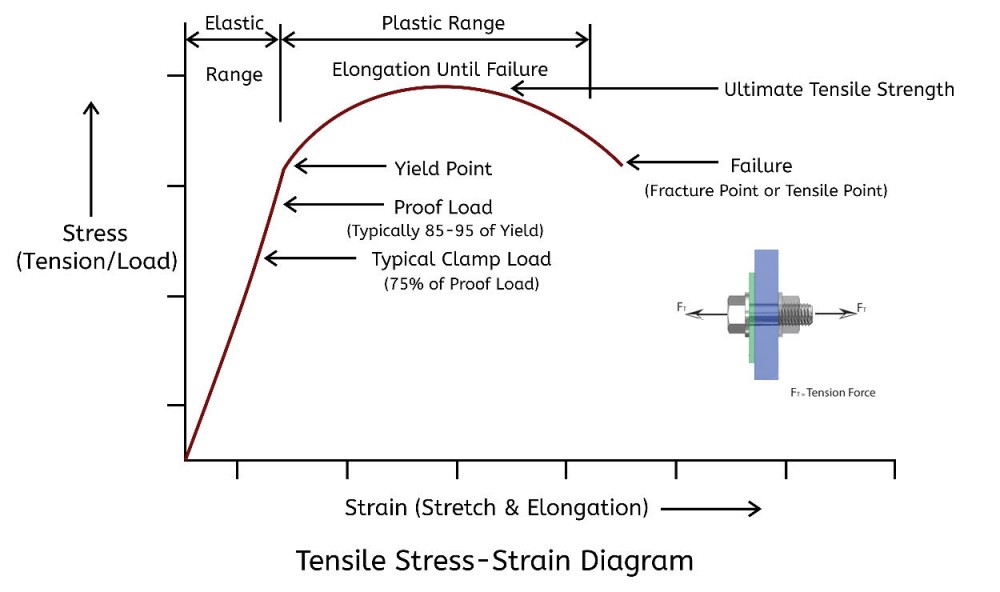
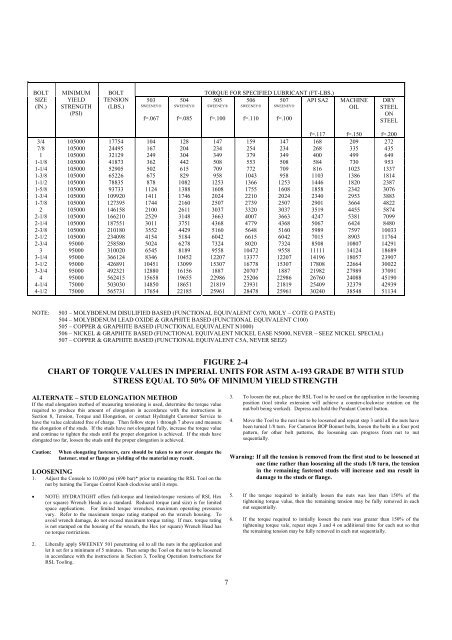
Torque To Yield Chart Abms Consultants Inc Mechanical Engineering Design.
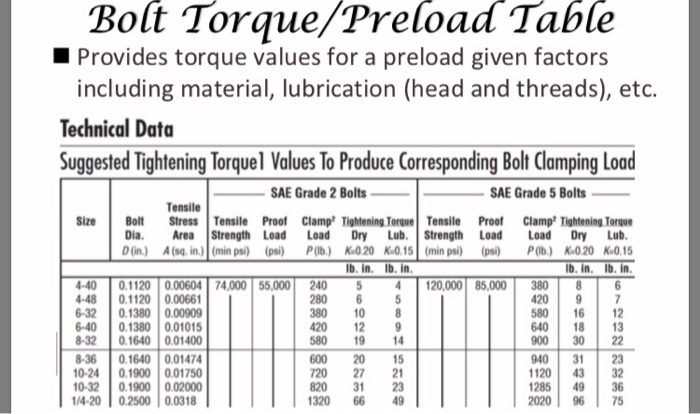
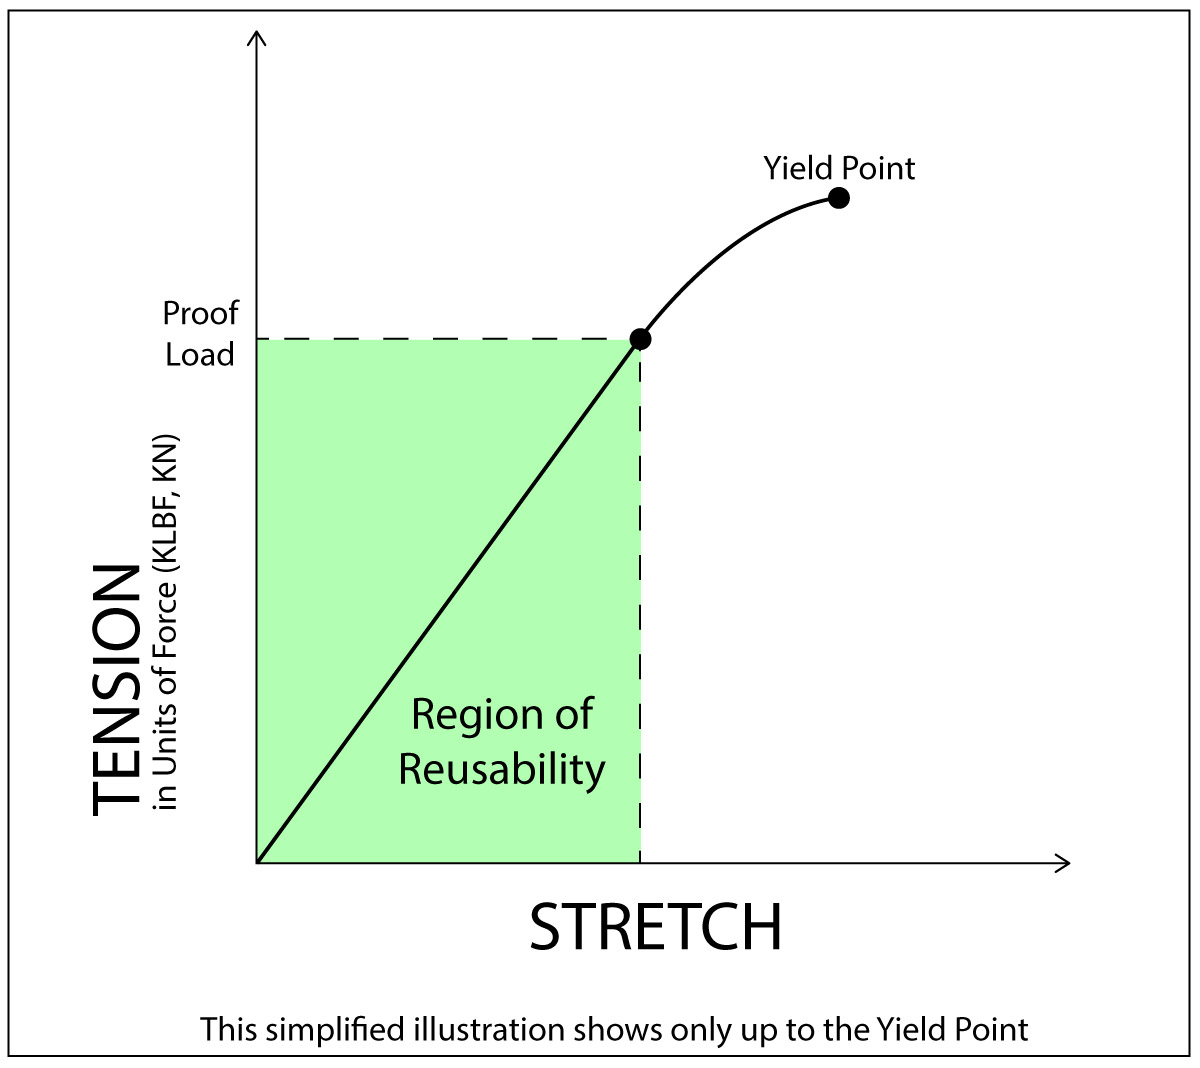
Torque To Yield Chart What Is Proof Load Of A Bolt And How Is It Different From.
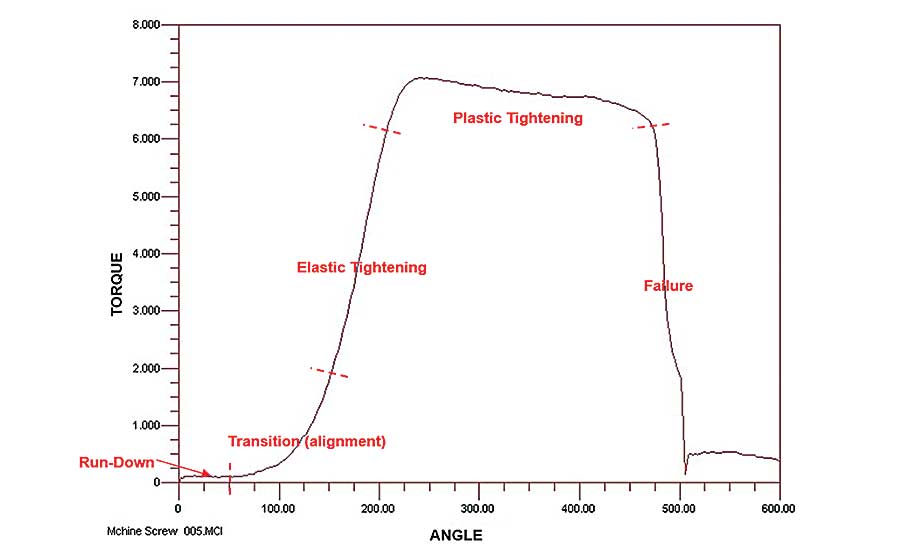
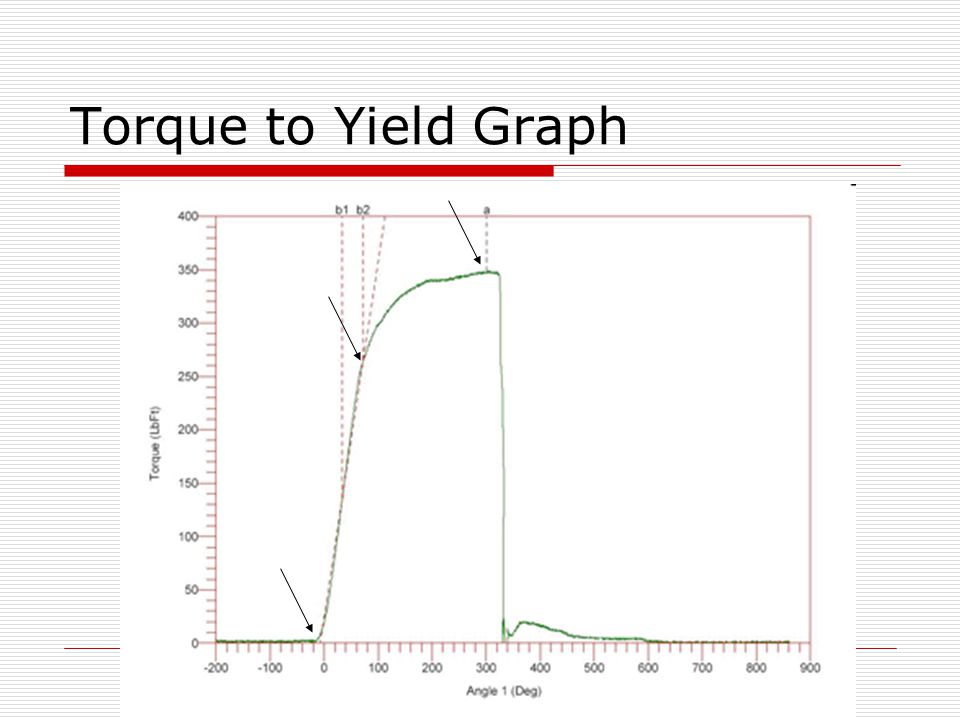
Torque To Yield Chart Torque Angle Explained With A Stress Strian Diagram.
Torque To Yield ChartTorque To Yield Chart Gold, White, Black, Red, Blue, Beige, Grey, Price, Rose, Orange, Purple, Green, Yellow, Cyan, Bordeaux, pink, Indigo, Brown, Silver,Electronics, Video Games, Computers, Cell Phones, Toys, Games, Apparel, Accessories, Shoes, Jewelry, Watches, Office Products, Sports & Outdoors, Sporting Goods, Baby Products, Health, Personal Care, Beauty, Home, Garden, Bed & Bath, Furniture, Tools, Hardware, Vacuums, Outdoor Living, Automotive Parts, Pet Supplies, Broadband, DSL, Books, Book Store, Magazine, Subscription, Music, CDs, DVDs, Videos,Online Shopping