
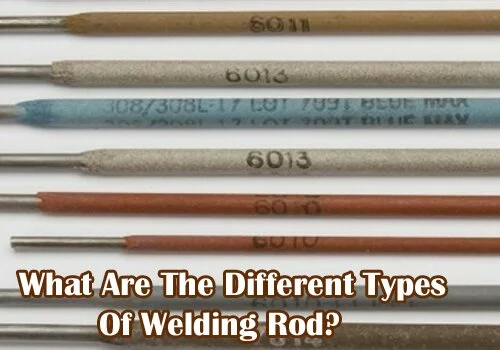
welding rod sizes and uses what welding rod do i use


 Welding Rod Uses Chart 247digimortal Co
 17 Paradigmatic Welding Rod Guide.
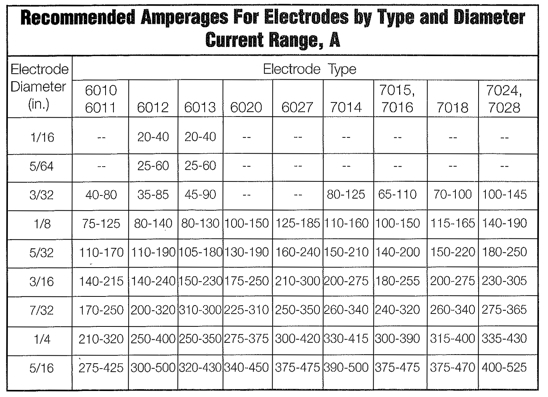
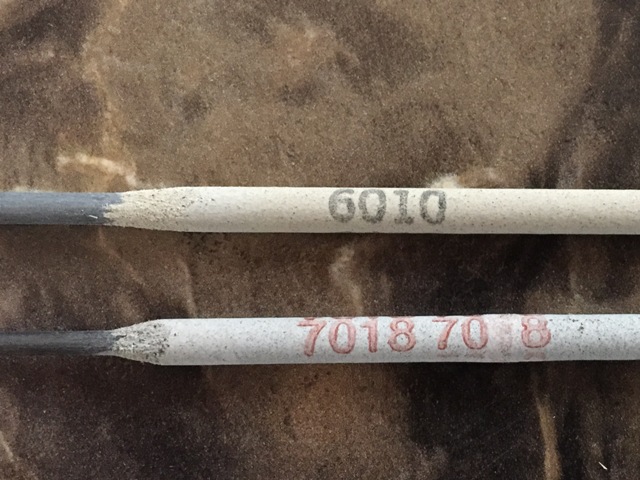
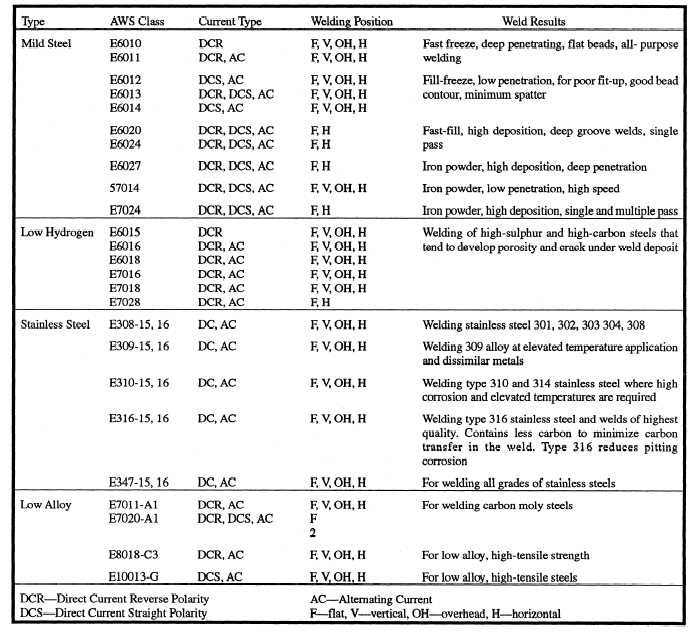
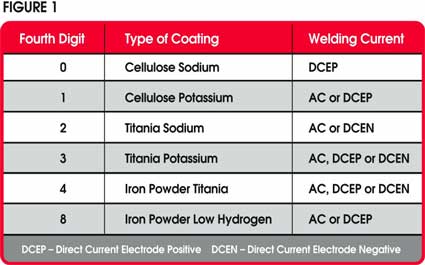
Smaw Welding Rod Chart Stick Welding Charts Ilmo Products Company.
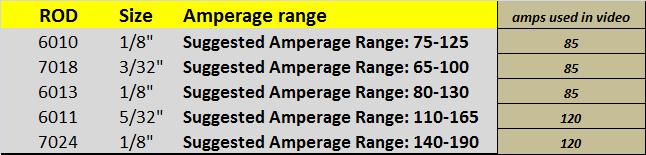
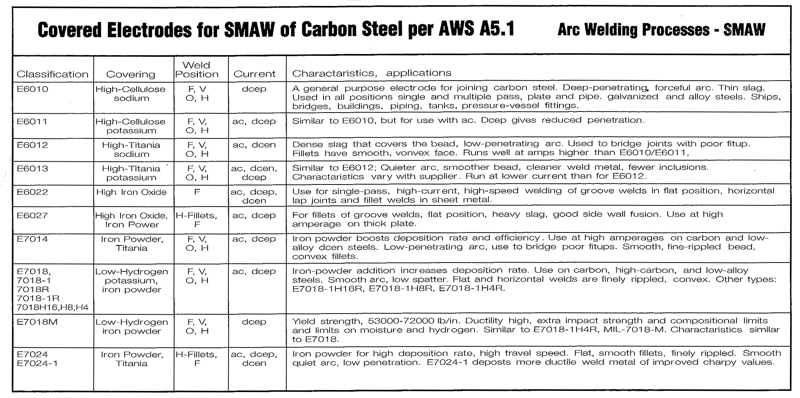
Smaw Welding Rod Chart 7018 Welding Rod Settings Stick Welding Chart Miller Welding.
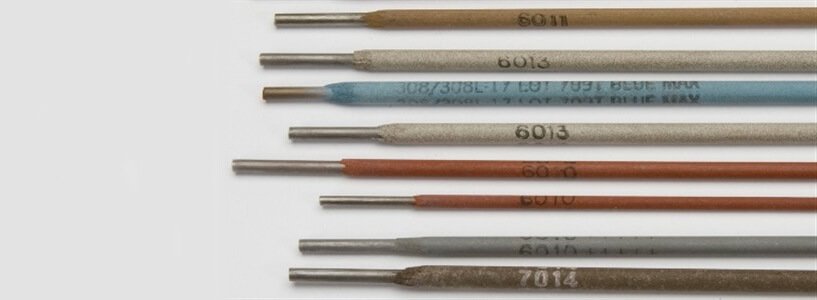
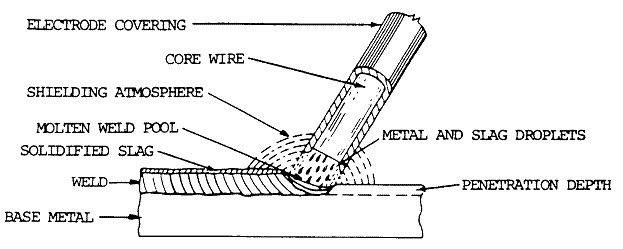
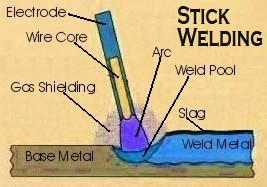
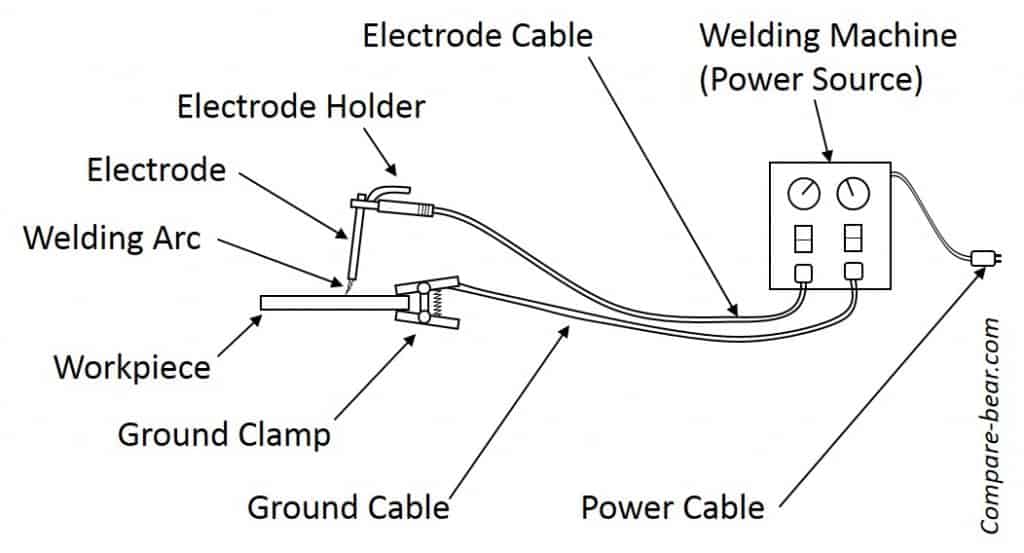
Smaw Welding Rod Chart Welding Electrode Diagram Wiring Diagram Mega.
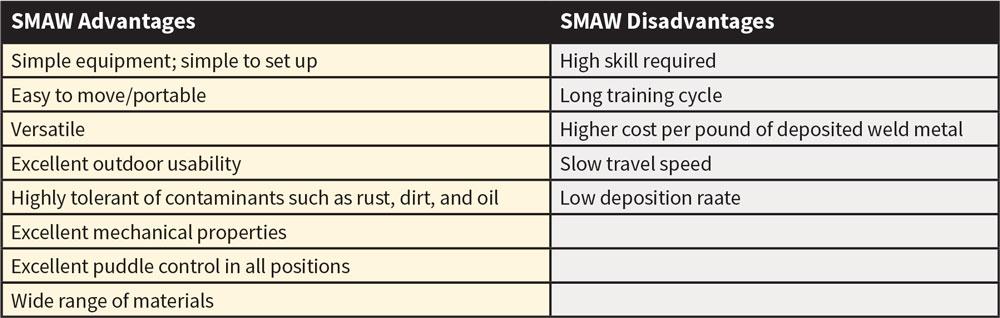
Smaw Welding Rod ChartSmaw Welding Rod Chart Gold, White, Black, Red, Blue, Beige, Grey, Price, Rose, Orange, Purple, Green, Yellow, Cyan, Bordeaux, pink, Indigo, Brown, Silver,Electronics, Video Games, Computers, Cell Phones, Toys, Games, Apparel, Accessories, Shoes, Jewelry, Watches, Office Products, Sports & Outdoors, Sporting Goods, Baby Products, Health, Personal Care, Beauty, Home, Garden, Bed & Bath, Furniture, Tools, Hardware, Vacuums, Outdoor Living, Automotive Parts, Pet Supplies, Broadband, DSL, Books, Book Store, Magazine, Subscription, Music, CDs, DVDs, Videos,Online Shopping