
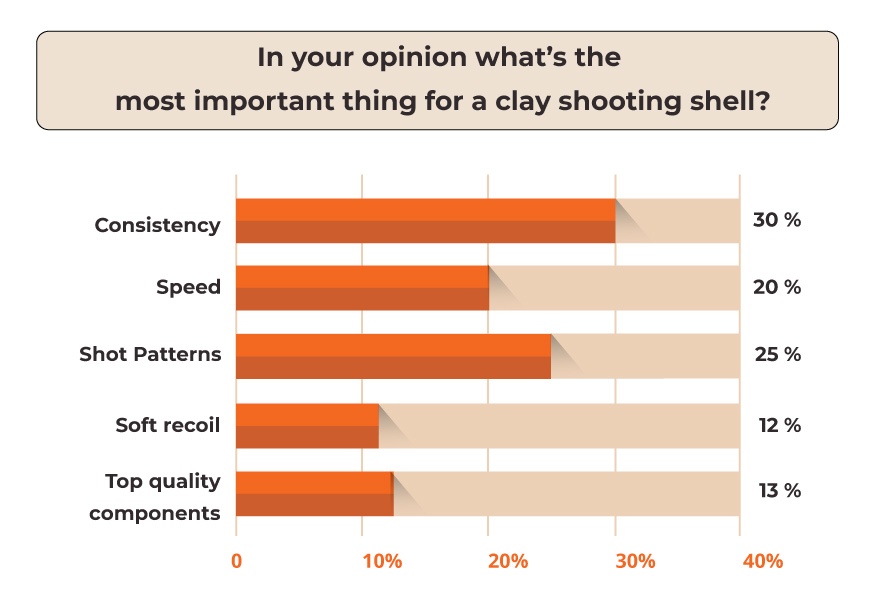
why baschieri pellagri target shells produce the most


 Comfortech Plus Benelli Law Enforcement Shotguns
 Managed Recoil Remington.
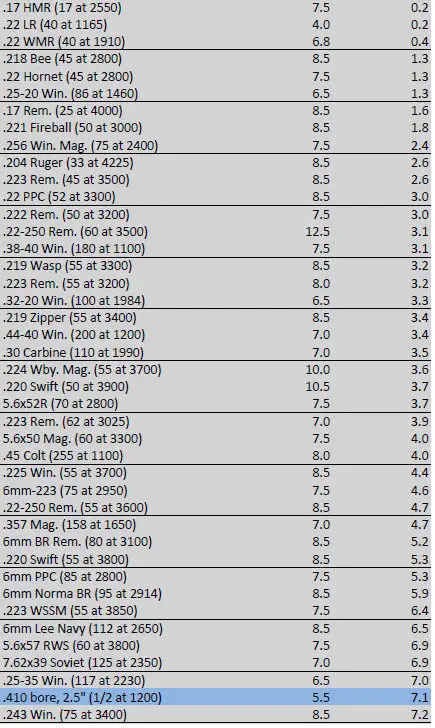
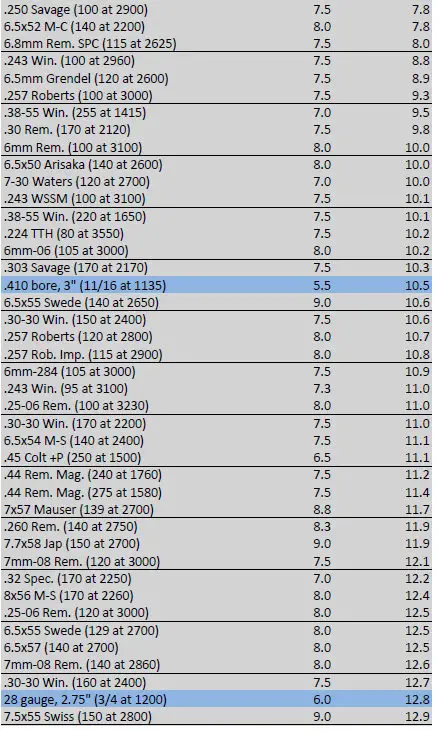
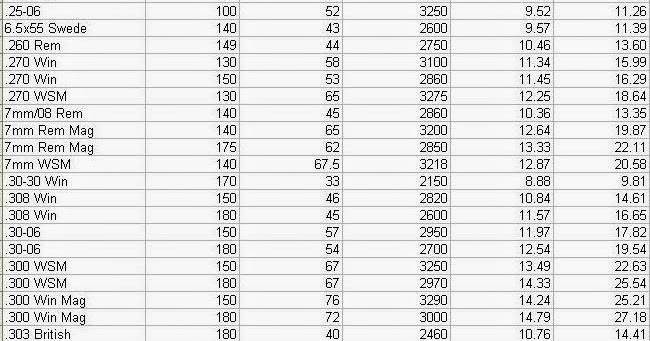
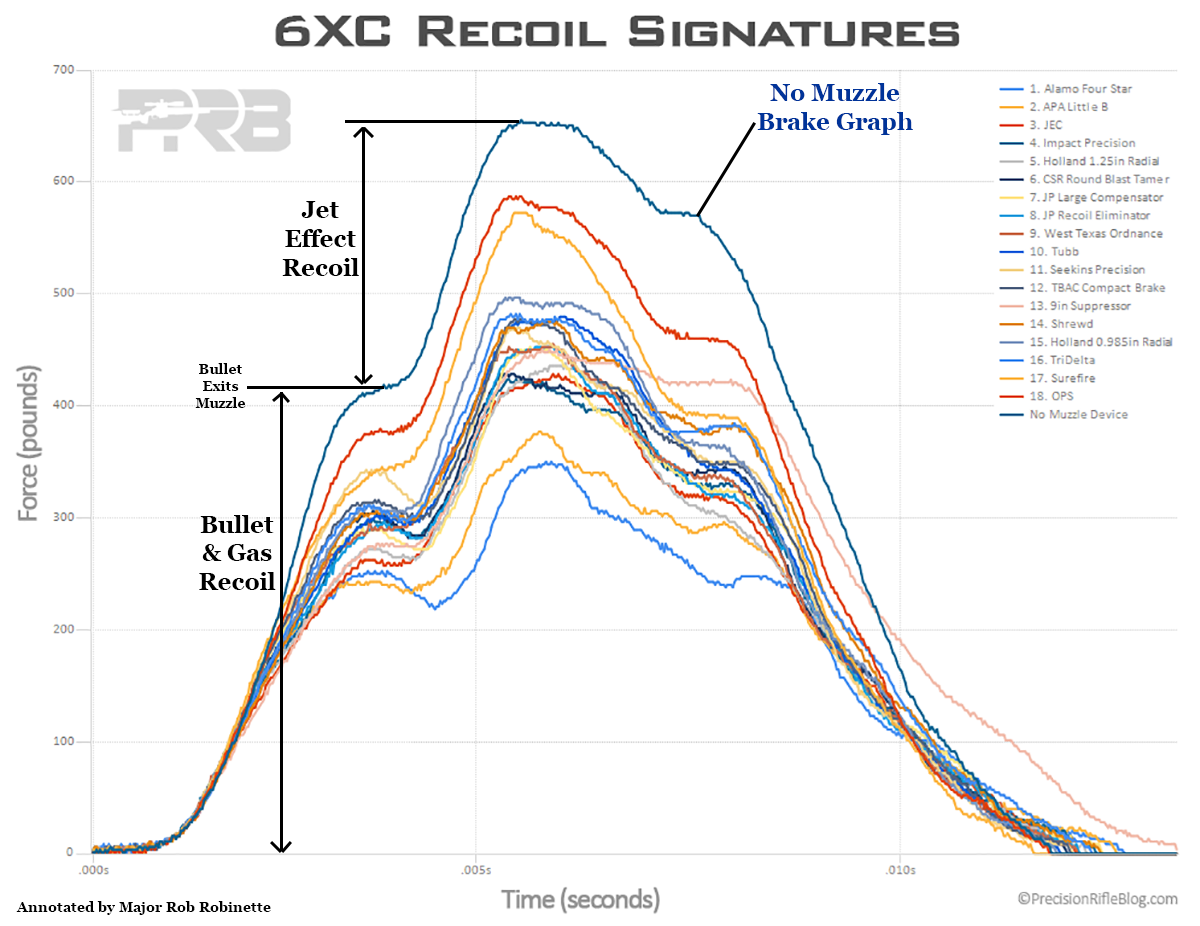
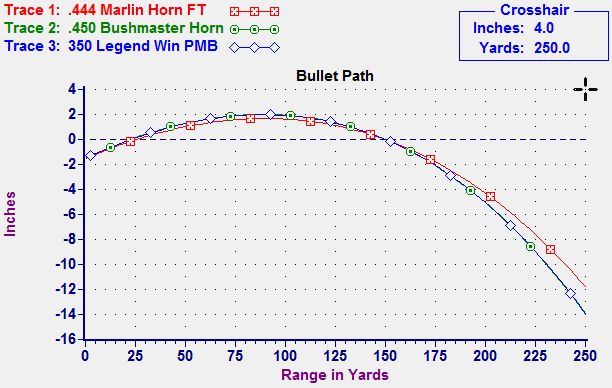
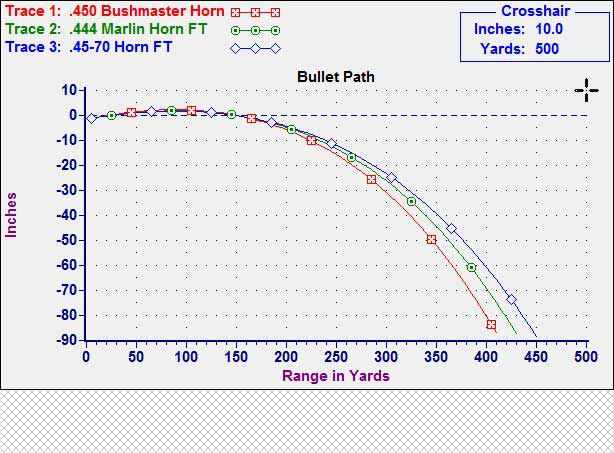
Shotgun Recoil Chart Three Charts Illustrating Maximum Projectile Ranges For.
Shotgun Recoil Chart Why Baschieri Pellagri Target Shells Produce The Most.
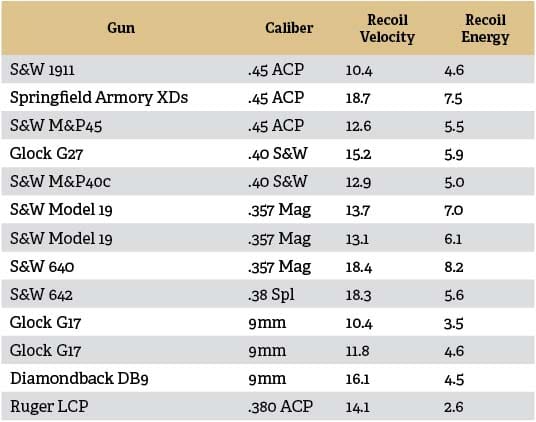
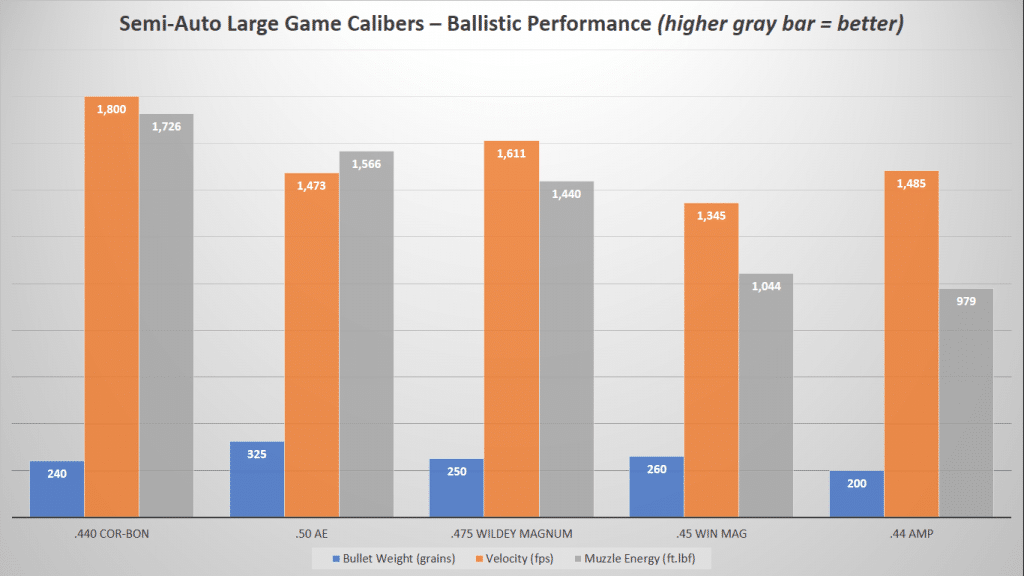
Shotgun Recoil Chart Handgun Calibers Comparison From Smallest To Largest 2019.
Shotgun Recoil ChartShotgun Recoil Chart Gold, White, Black, Red, Blue, Beige, Grey, Price, Rose, Orange, Purple, Green, Yellow, Cyan, Bordeaux, pink, Indigo, Brown, Silver,Electronics, Video Games, Computers, Cell Phones, Toys, Games, Apparel, Accessories, Shoes, Jewelry, Watches, Office Products, Sports & Outdoors, Sporting Goods, Baby Products, Health, Personal Care, Beauty, Home, Garden, Bed & Bath, Furniture, Tools, Hardware, Vacuums, Outdoor Living, Automotive Parts, Pet Supplies, Broadband, DSL, Books, Book Store, Magazine, Subscription, Music, CDs, DVDs, Videos,Online Shopping