
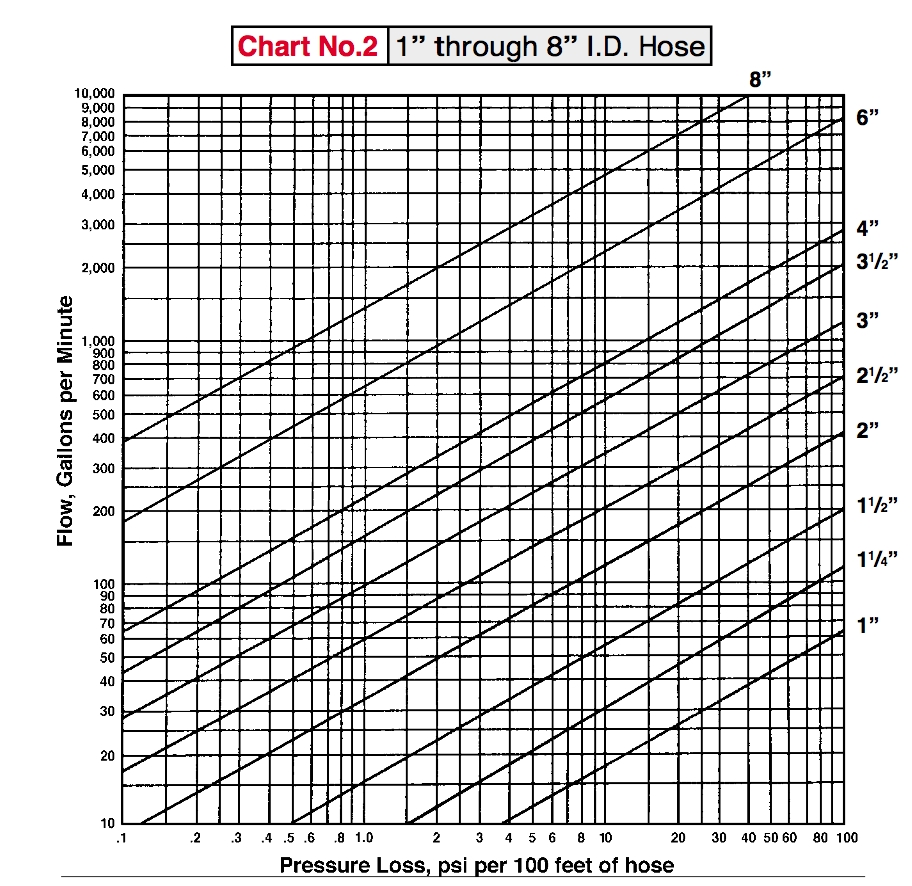
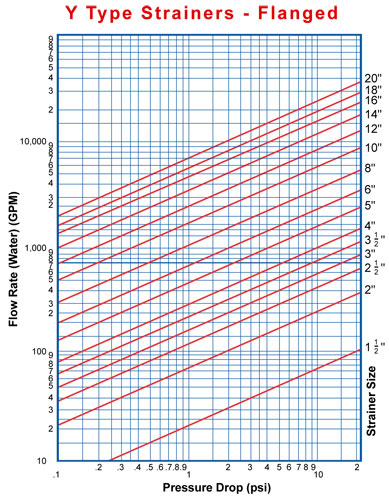
pipe diameter flow rate chart bedowntowndaytona com


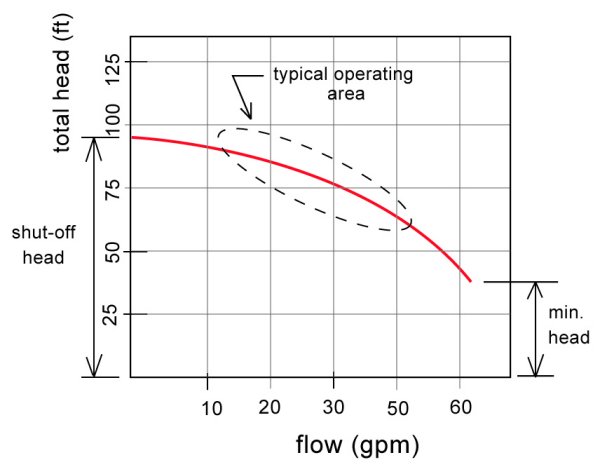


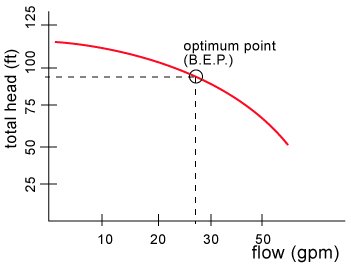


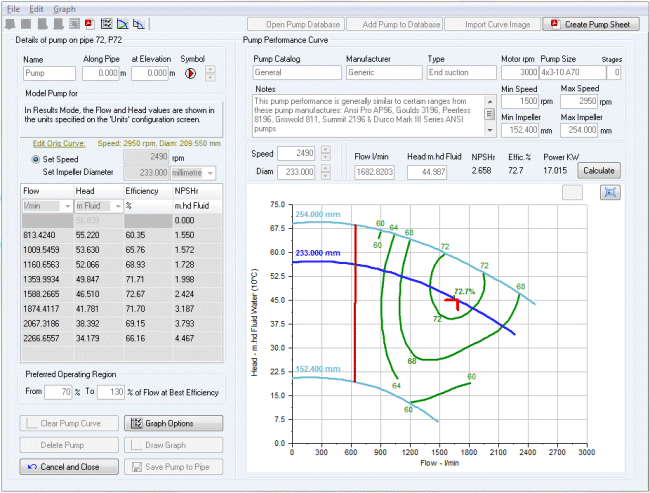


 How To Properly Set Pump Pressure Waterinjection Info
 Reservoir Flow.
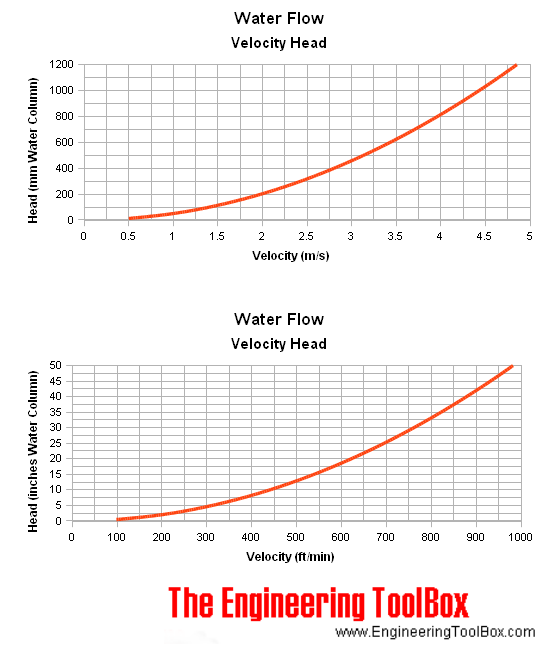
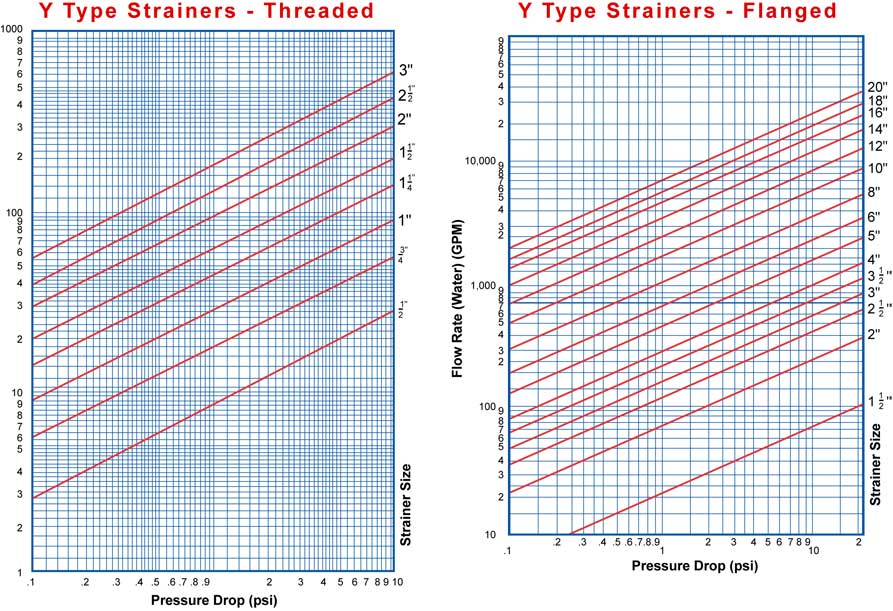
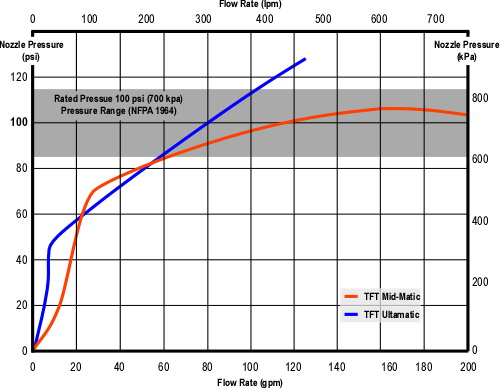
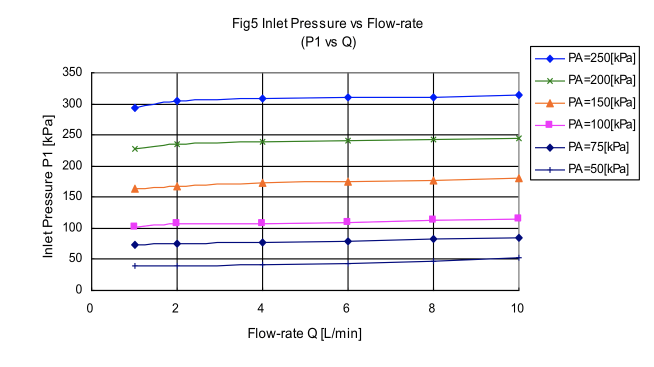
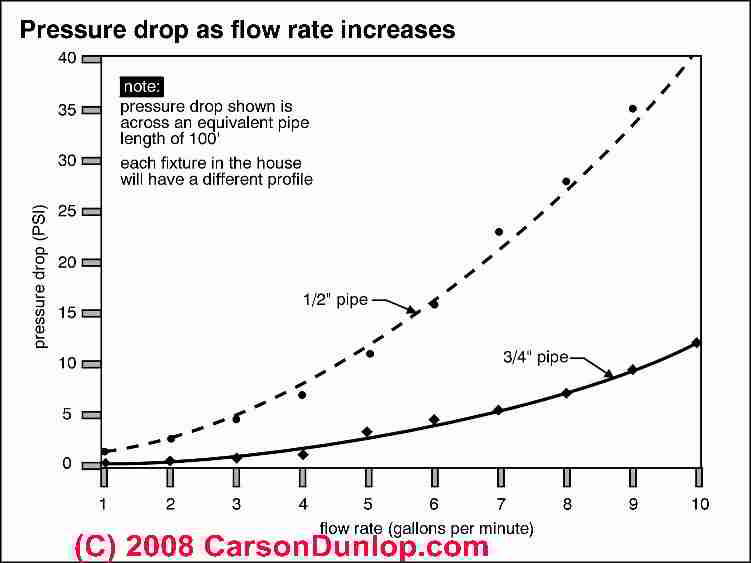
Pressure Vs Flow Rate Chart Velocity And Viscosity The Reality Of Pressure Drop With.
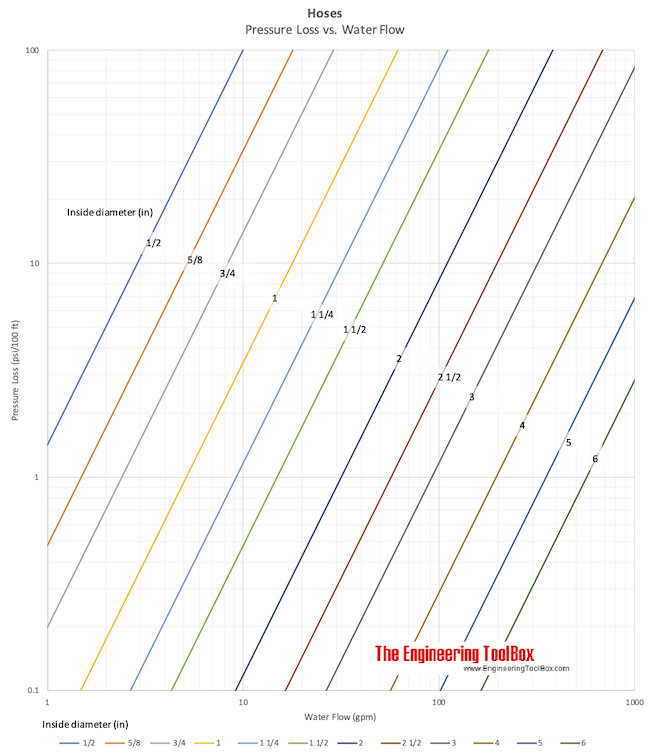
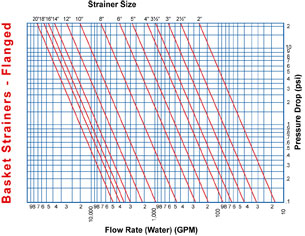
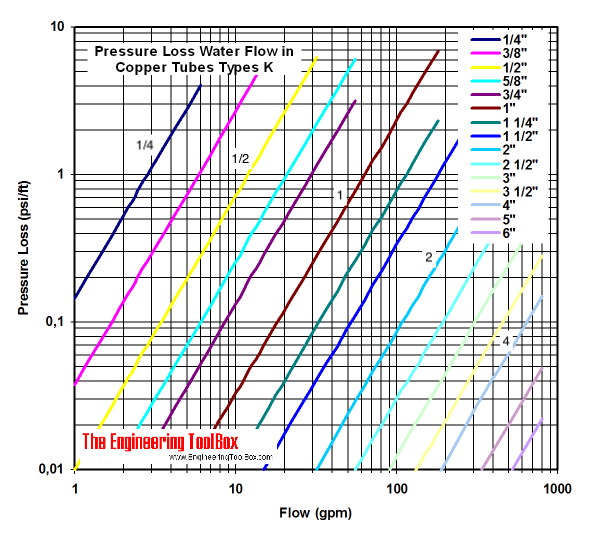
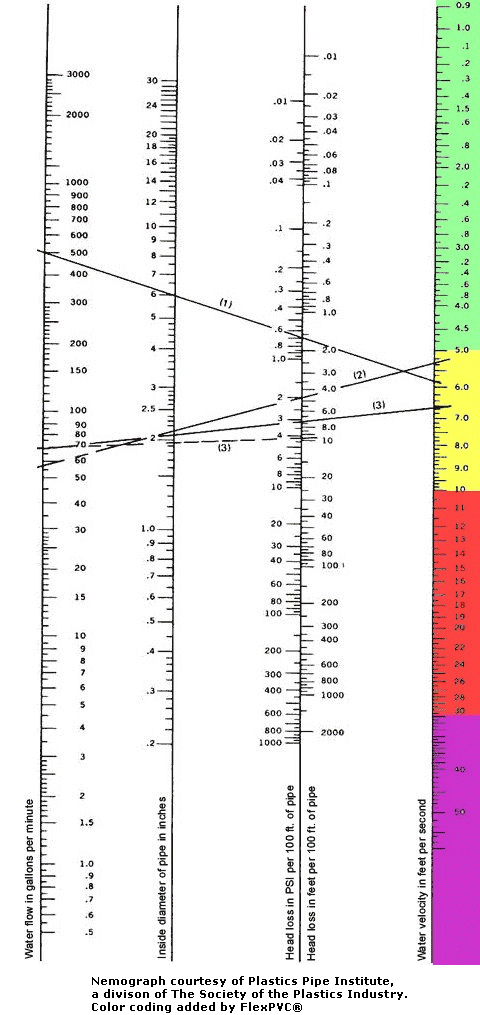
Pressure Vs Flow Rate Chart 1 Flexpvc Com Water Flow Charts Based On Pipe Size Gpm Gph.
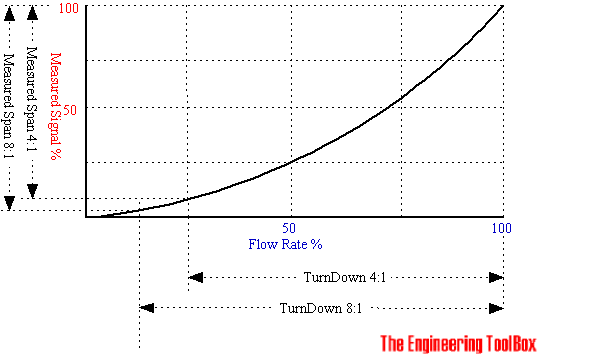
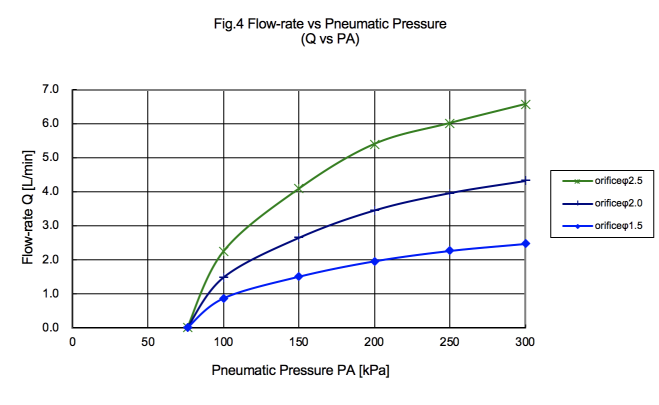
Pressure Vs Flow Rate Chart Series Asl10 01 Asl Series 1 11 Ratio Air Driven High.
Pressure Vs Flow Rate ChartPressure Vs Flow Rate Chart Gold, White, Black, Red, Blue, Beige, Grey, Price, Rose, Orange, Purple, Green, Yellow, Cyan, Bordeaux, pink, Indigo, Brown, Silver,Electronics, Video Games, Computers, Cell Phones, Toys, Games, Apparel, Accessories, Shoes, Jewelry, Watches, Office Products, Sports & Outdoors, Sporting Goods, Baby Products, Health, Personal Care, Beauty, Home, Garden, Bed & Bath, Furniture, Tools, Hardware, Vacuums, Outdoor Living, Automotive Parts, Pet Supplies, Broadband, DSL, Books, Book Store, Magazine, Subscription, Music, CDs, DVDs, Videos,Online Shopping