
bullet graph wikipedia


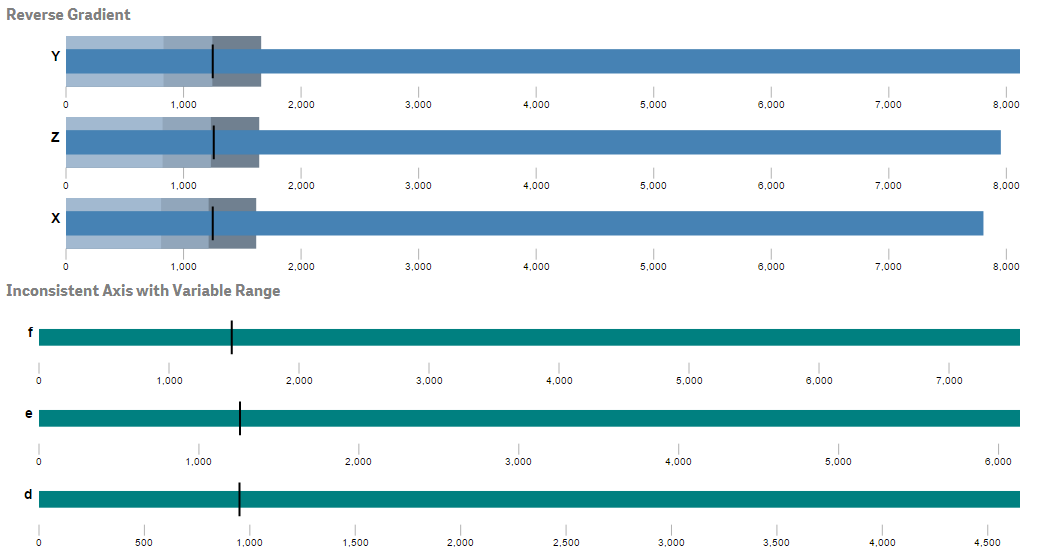


 Bullet Graph Wikipedia
 Module 12 Bullet Chart.
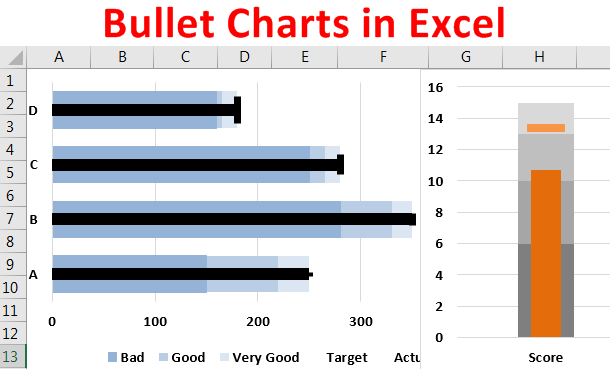
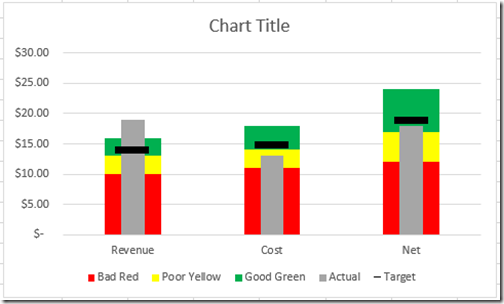
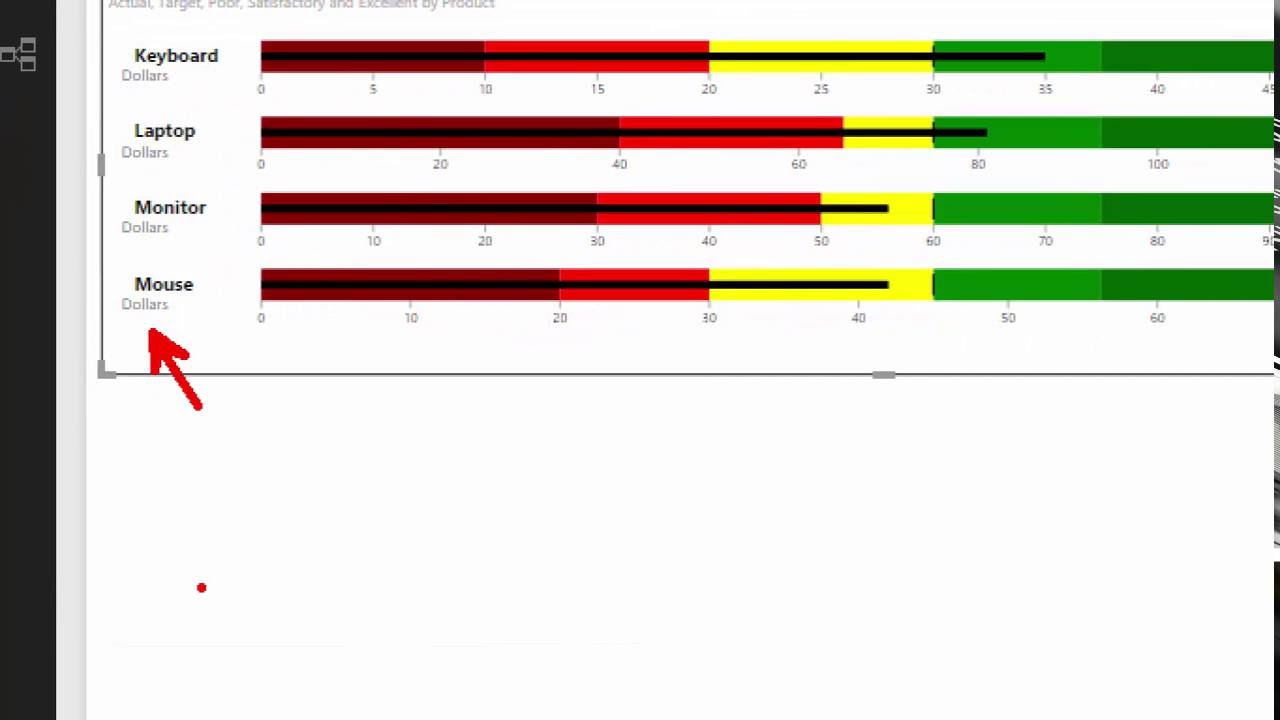
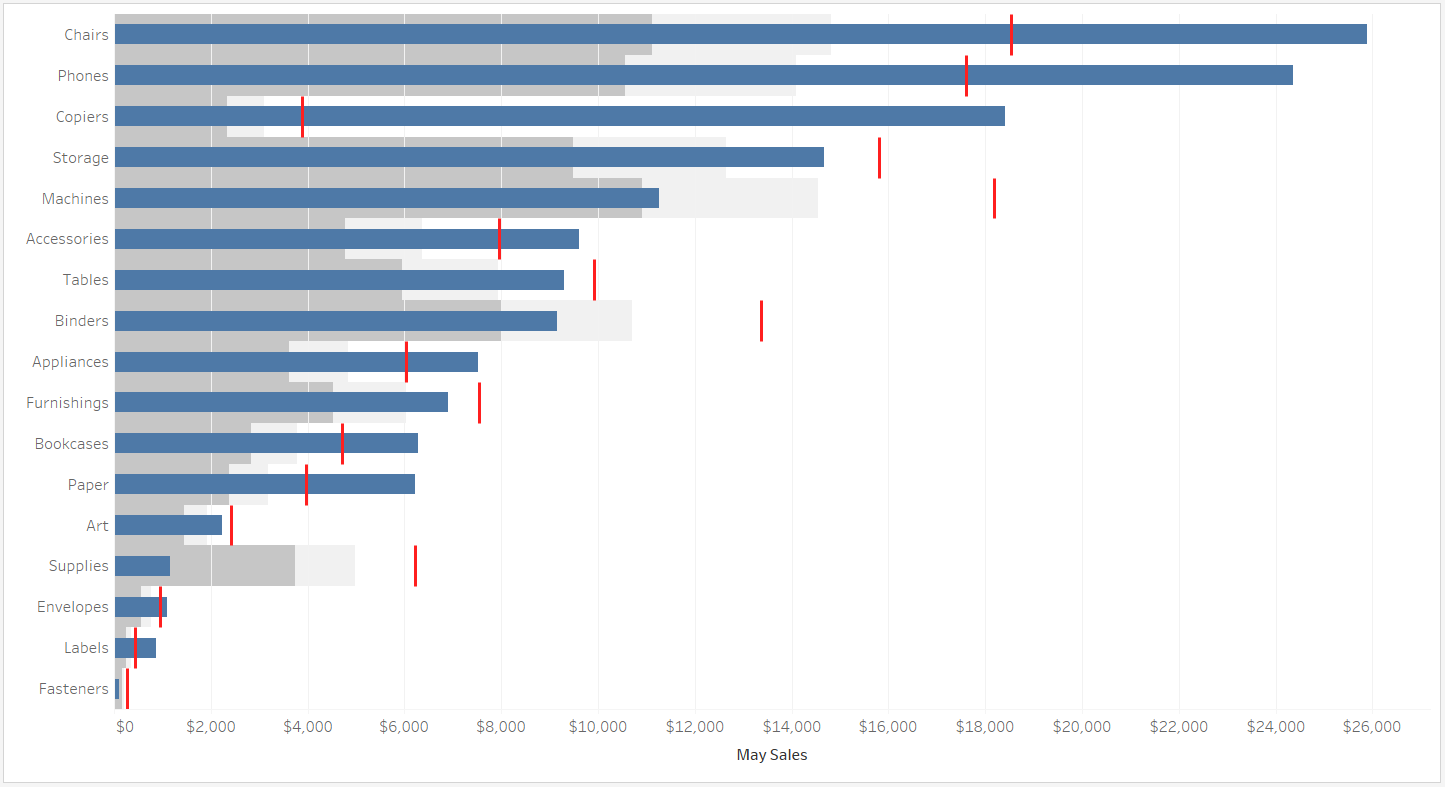
Bullet Gauge Chart Bullet Charts The New Gauge How To Create Bullet Charts.
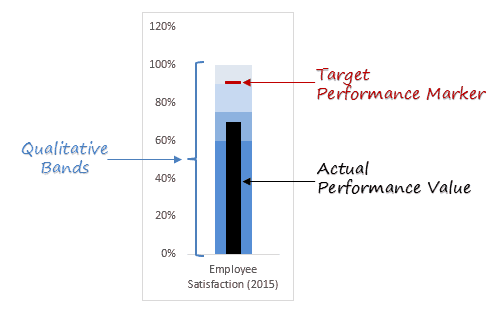
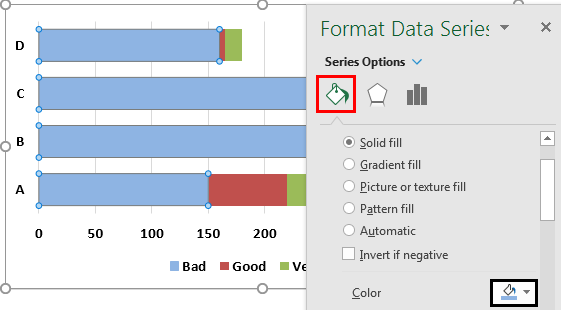
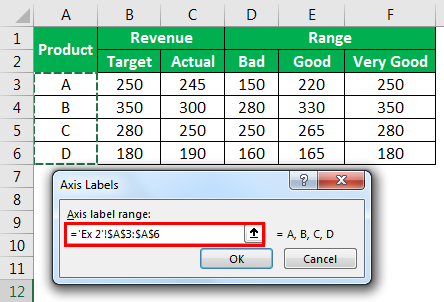
Bullet Gauge Chart Creating A Bullet Chart In Excel A Step By Step Guide.
Bullet Gauge Chart Bullet Chart In Excel Step By Step Guide To Create A.
Bullet Gauge ChartBullet Gauge Chart Gold, White, Black, Red, Blue, Beige, Grey, Price, Rose, Orange, Purple, Green, Yellow, Cyan, Bordeaux, pink, Indigo, Brown, Silver,Electronics, Video Games, Computers, Cell Phones, Toys, Games, Apparel, Accessories, Shoes, Jewelry, Watches, Office Products, Sports & Outdoors, Sporting Goods, Baby Products, Health, Personal Care, Beauty, Home, Garden, Bed & Bath, Furniture, Tools, Hardware, Vacuums, Outdoor Living, Automotive Parts, Pet Supplies, Broadband, DSL, Books, Book Store, Magazine, Subscription, Music, CDs, DVDs, Videos,Online Shopping