
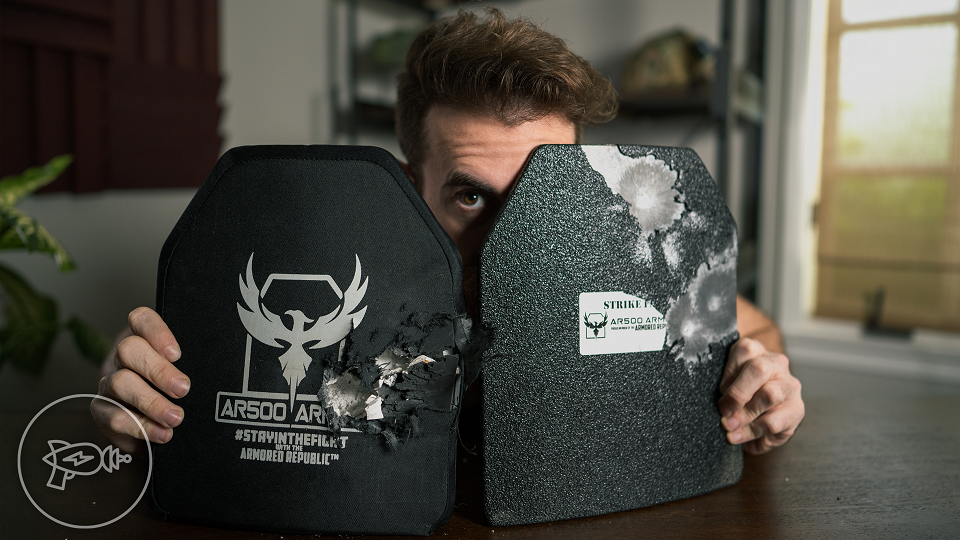
rifle plates level iii iii and iv body armor plates from


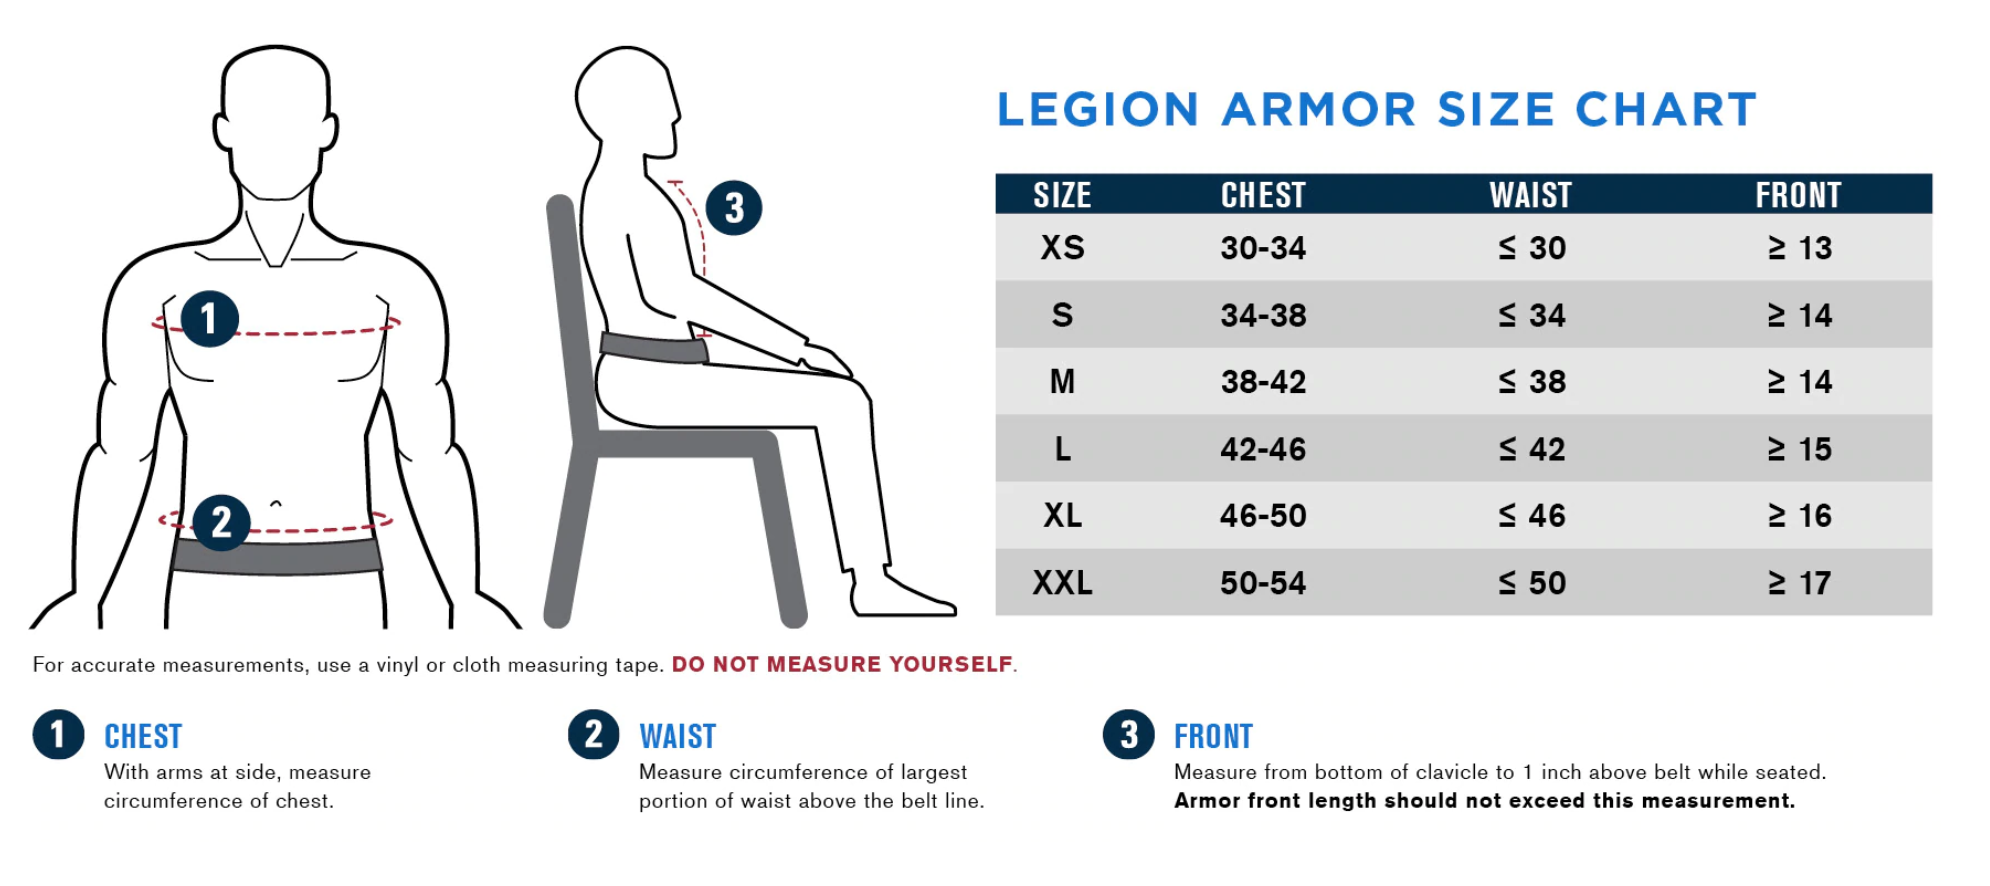


 Body Armor Guide Safe Life Defense
 Review Safeguard Ghost Body Armor Alloutdoor.
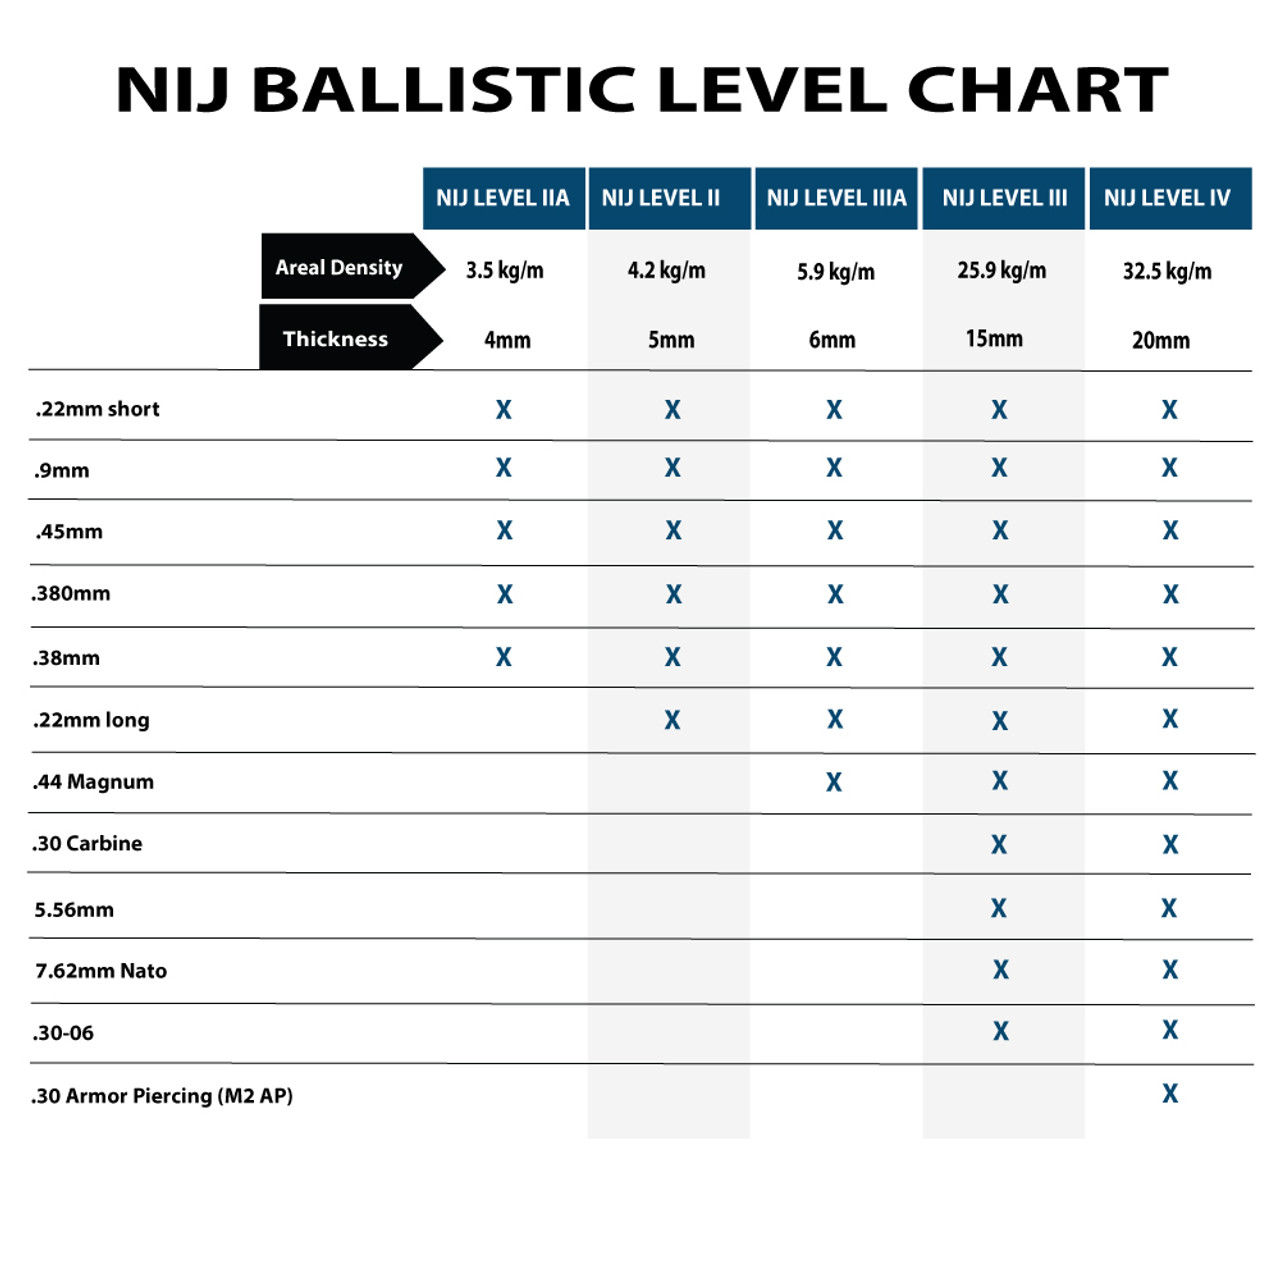
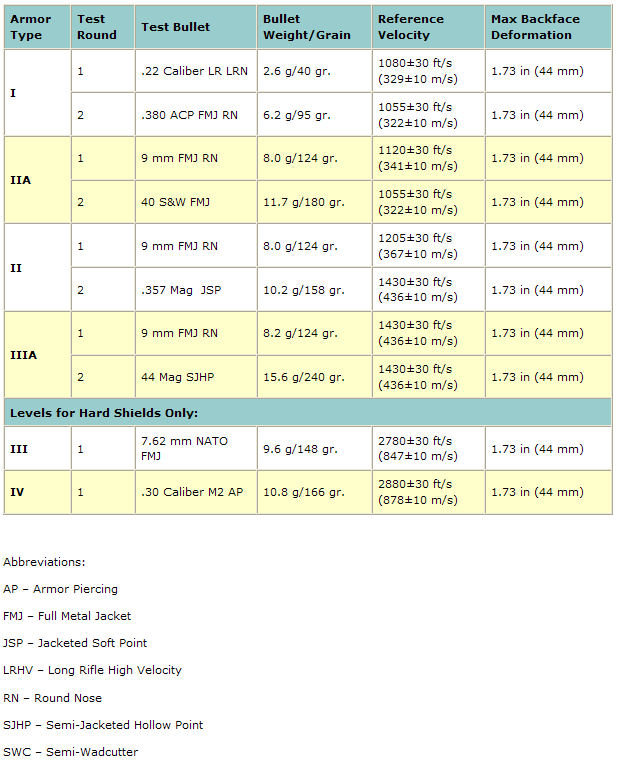
Body Armor Levels Chart Body Armor 101 Infidel Body Armor Tactical Body Armor.
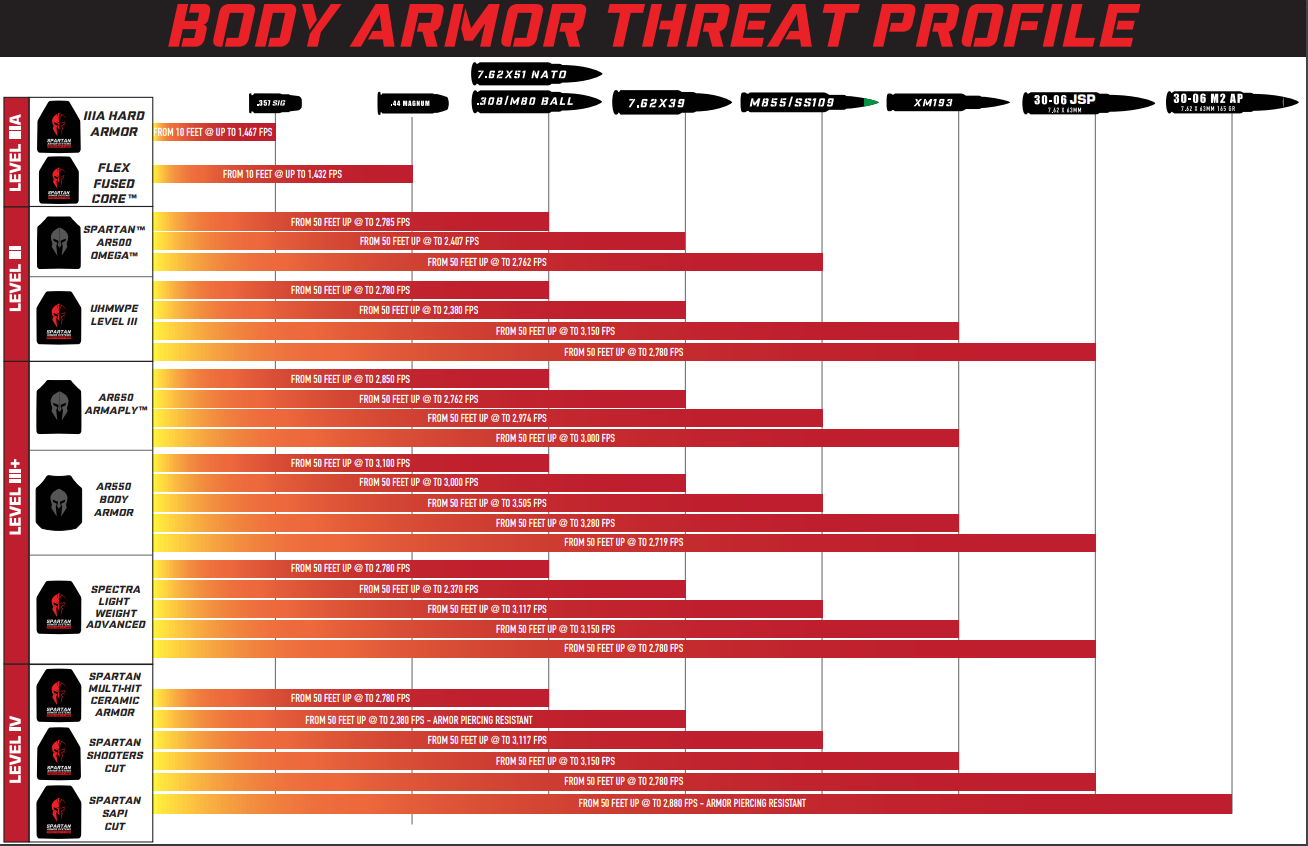
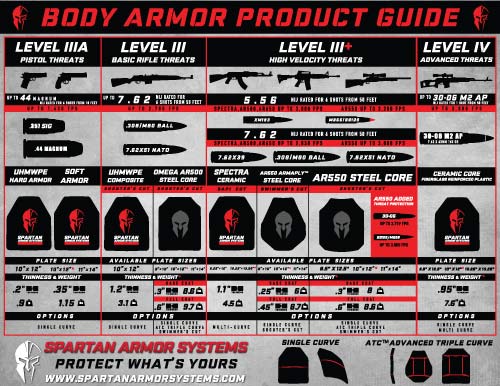
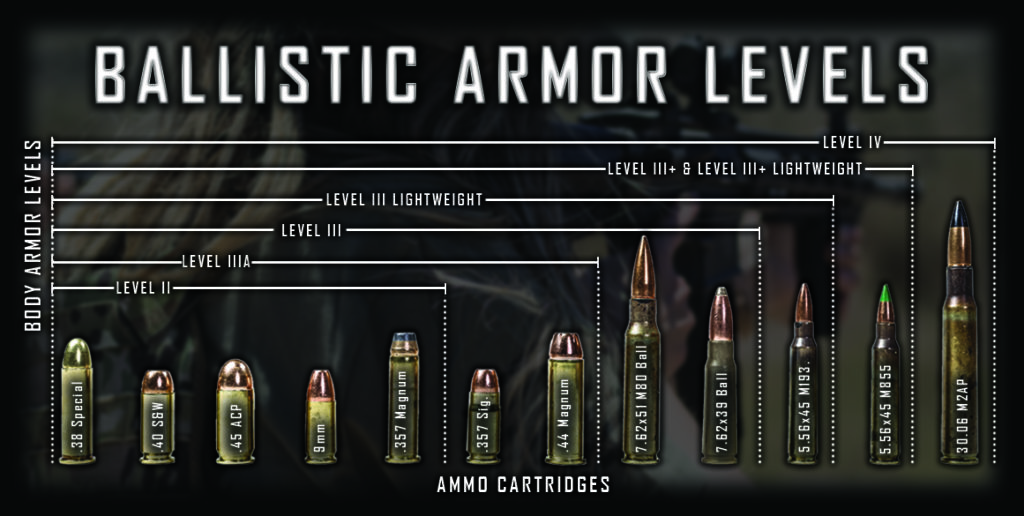
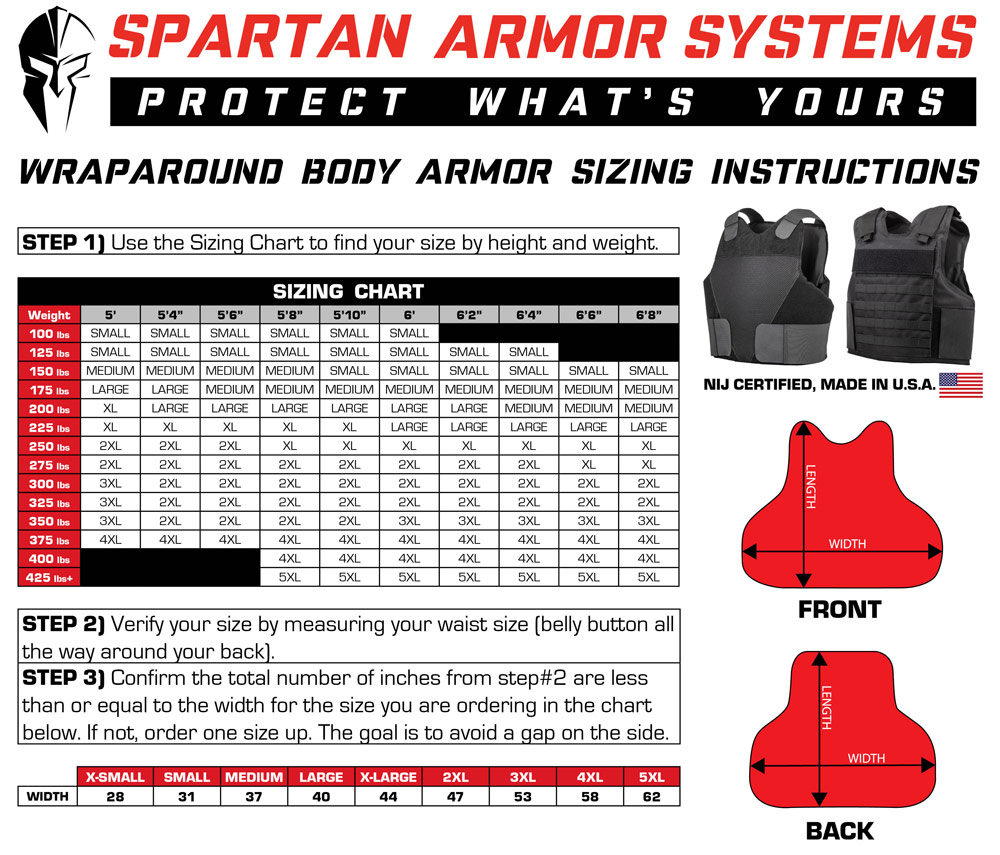
Body Armor Levels Chart Spartan Armor Systems Tactical Level Iiia Certified Wraparound Vest.
Body Armor Levels Chart Body Armour New Materials New Systems Sciencedirect.
Body Armor Levels ChartBody Armor Levels Chart Gold, White, Black, Red, Blue, Beige, Grey, Price, Rose, Orange, Purple, Green, Yellow, Cyan, Bordeaux, pink, Indigo, Brown, Silver,Electronics, Video Games, Computers, Cell Phones, Toys, Games, Apparel, Accessories, Shoes, Jewelry, Watches, Office Products, Sports & Outdoors, Sporting Goods, Baby Products, Health, Personal Care, Beauty, Home, Garden, Bed & Bath, Furniture, Tools, Hardware, Vacuums, Outdoor Living, Automotive Parts, Pet Supplies, Broadband, DSL, Books, Book Store, Magazine, Subscription, Music, CDs, DVDs, Videos,Online Shopping