
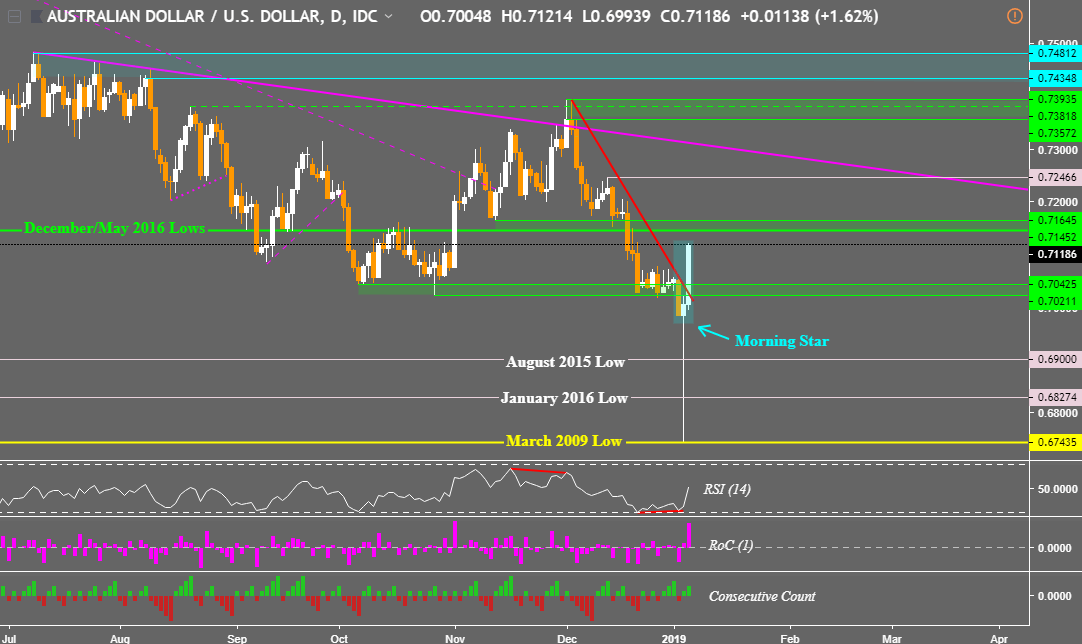
aud usd aud cad eur aud prices eye technical reversal


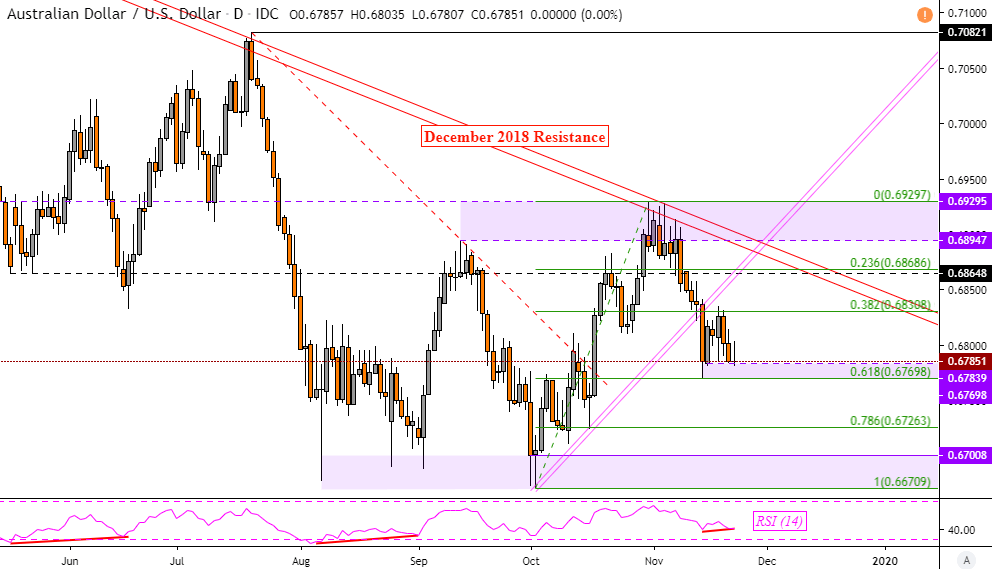


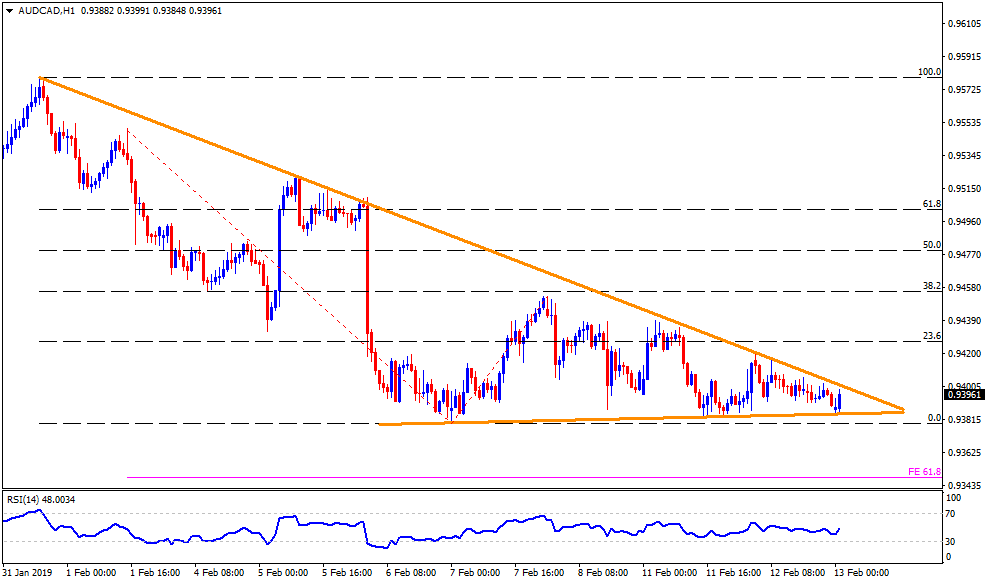


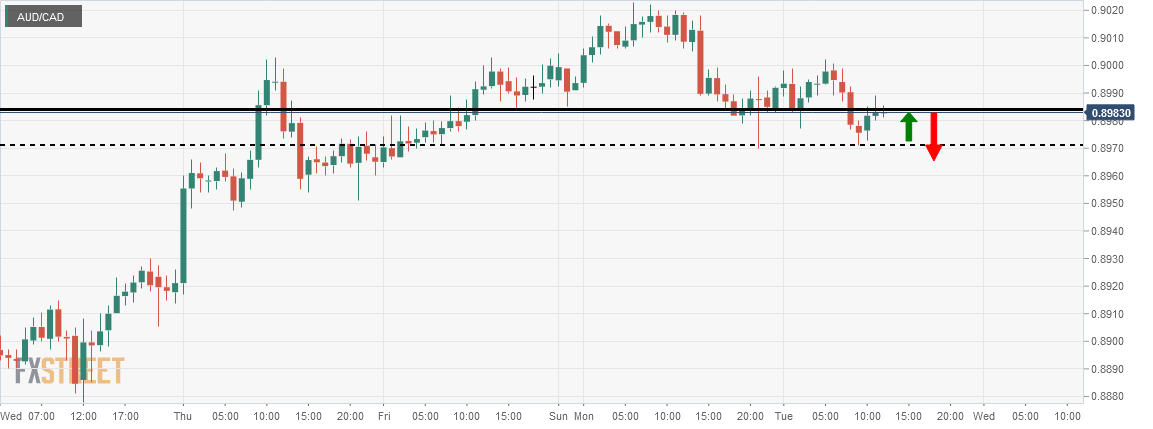


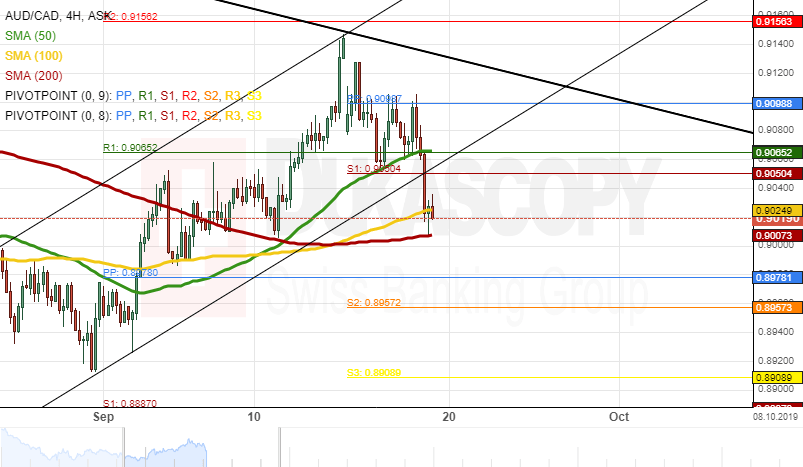
 Audcad Three Consecutive H1 Bearish Candles
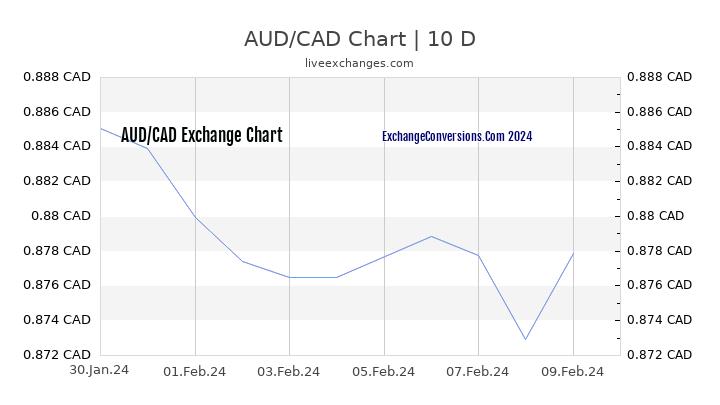
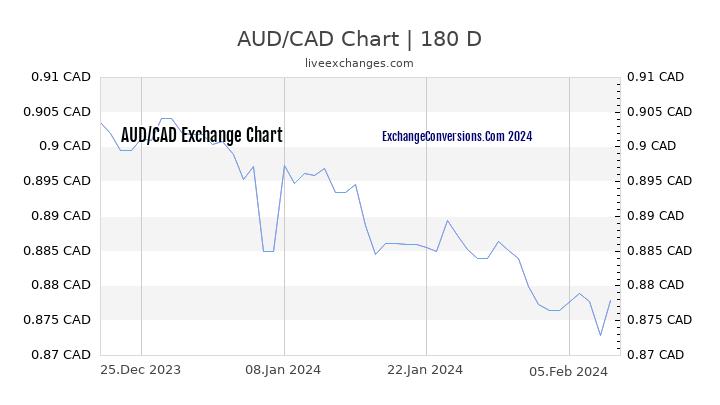
 Australian Dollar Aud To Canadian Dollar Cad Exchange.
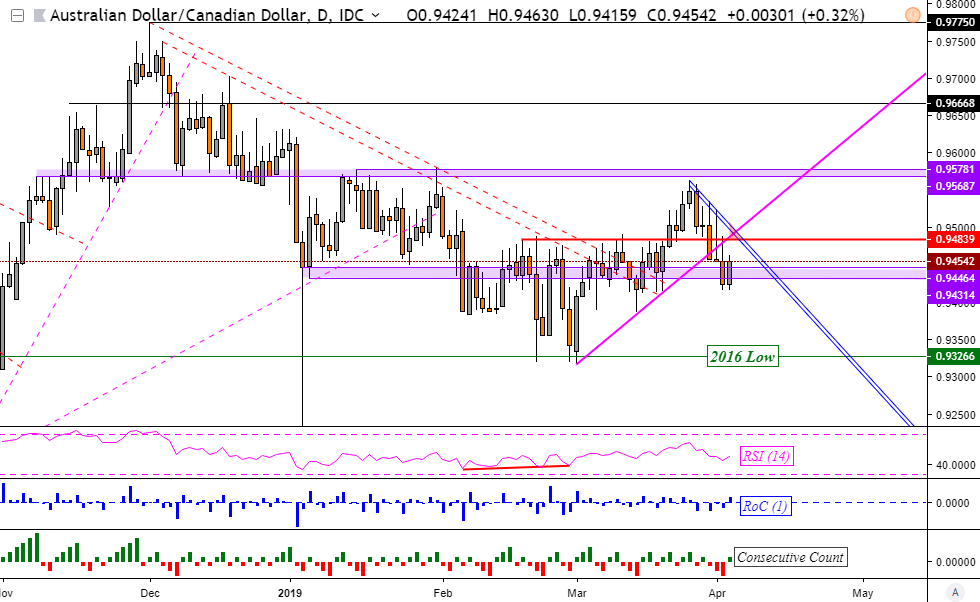
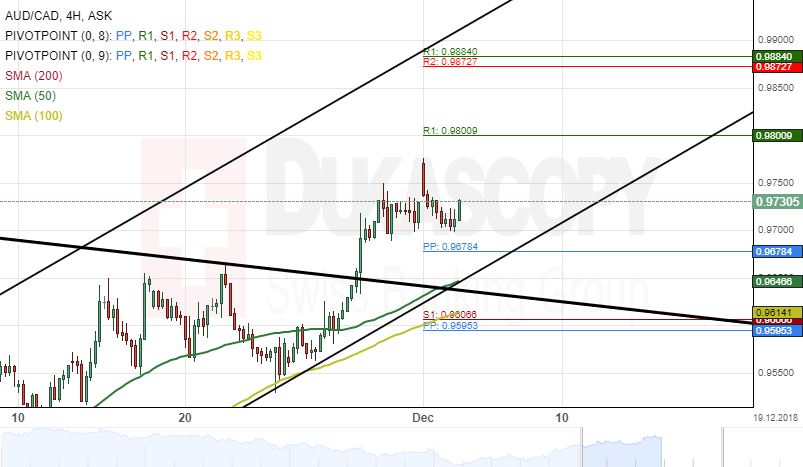
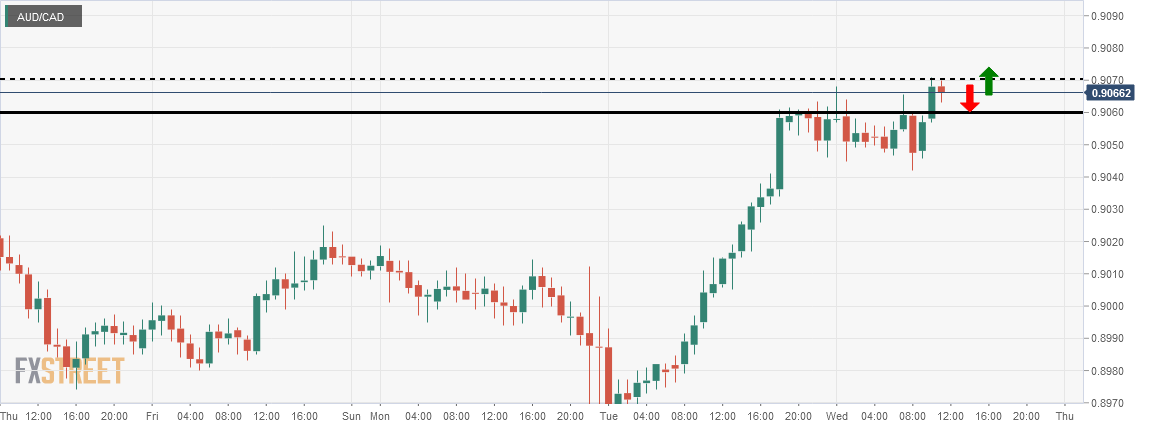
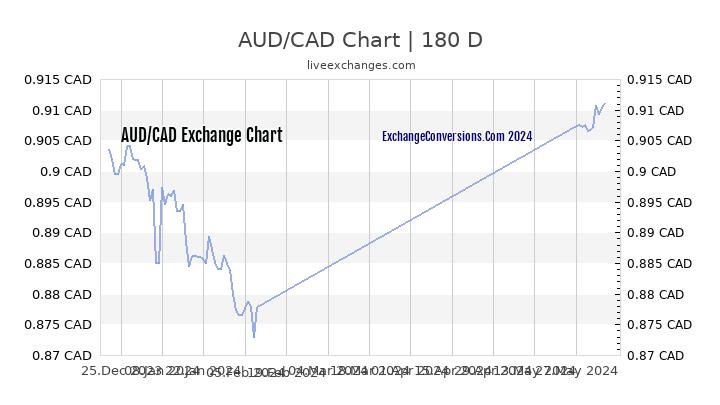
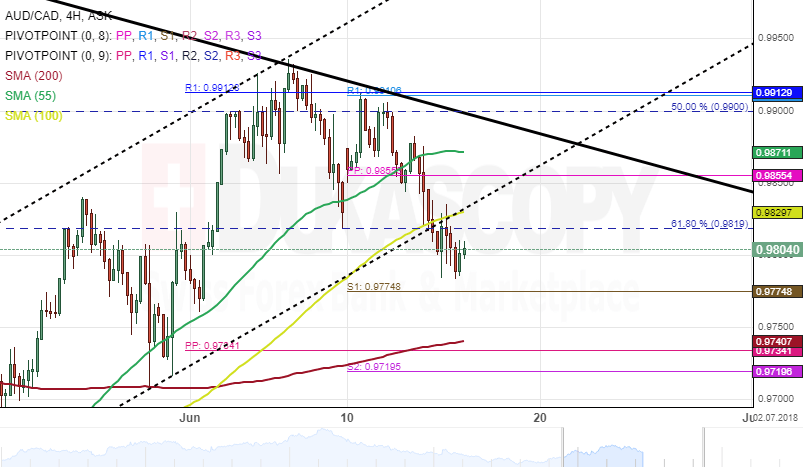
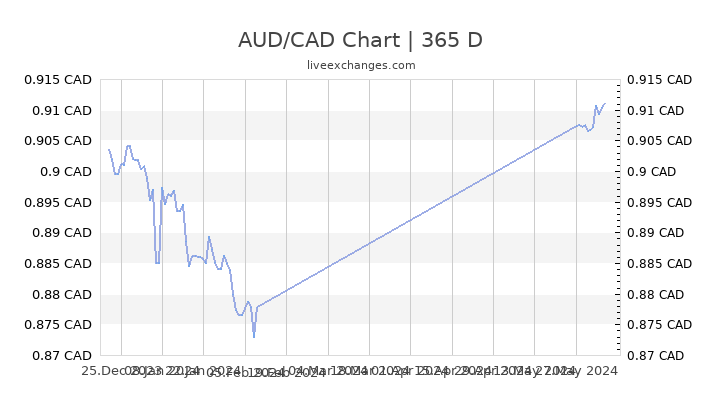
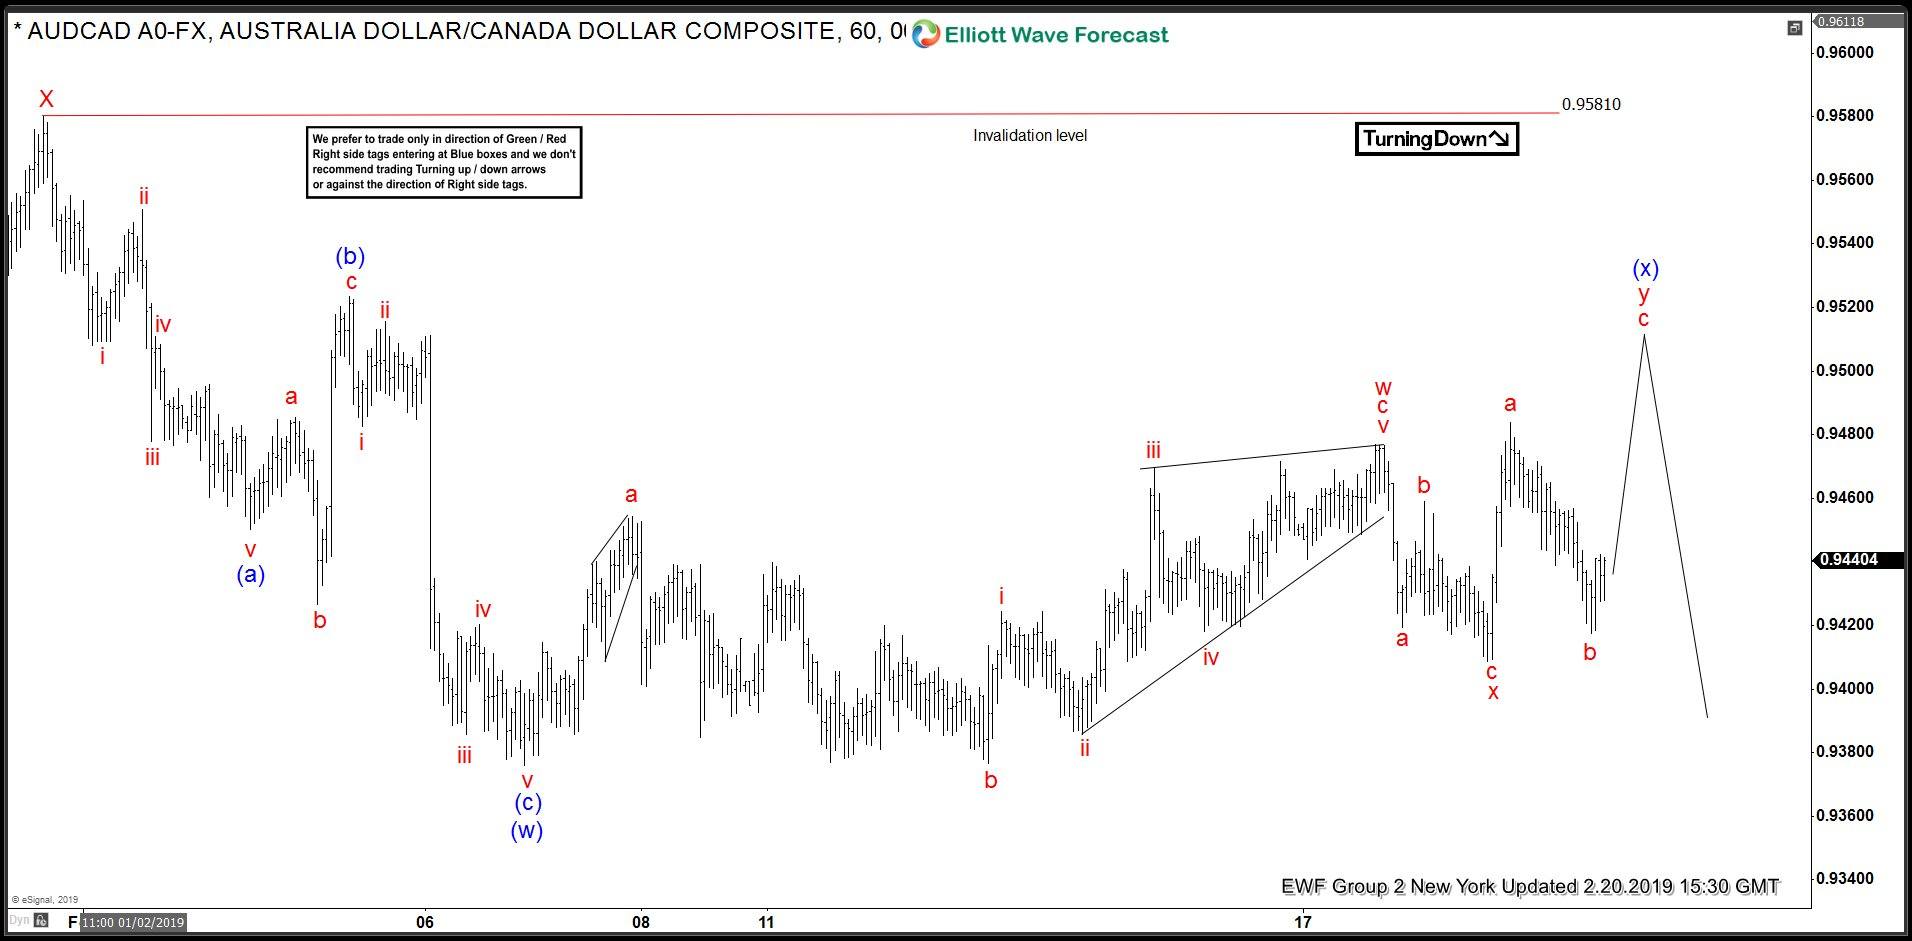
Aud Cad Chart Aud Cad Technical Analysis 0 9475 Becomes Immediate Barrier.
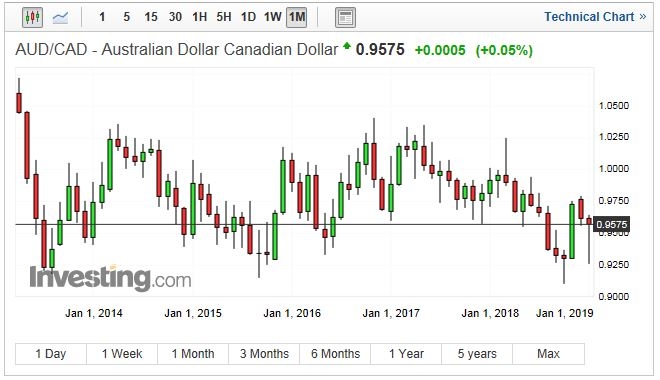
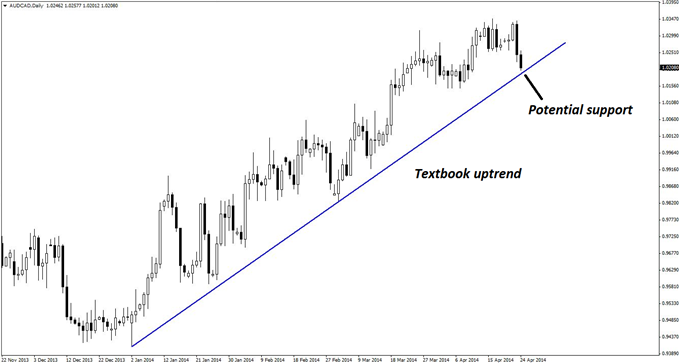
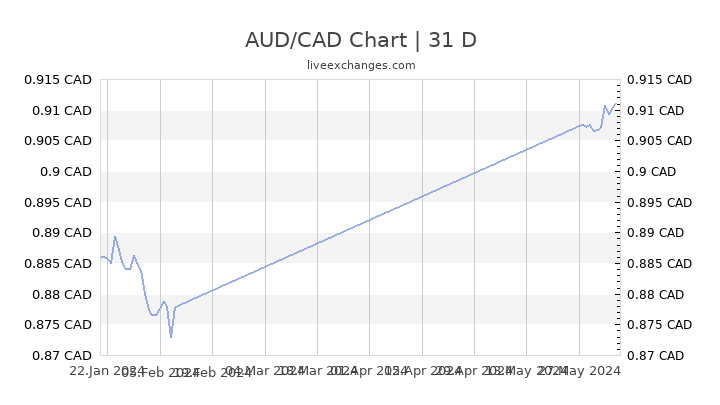
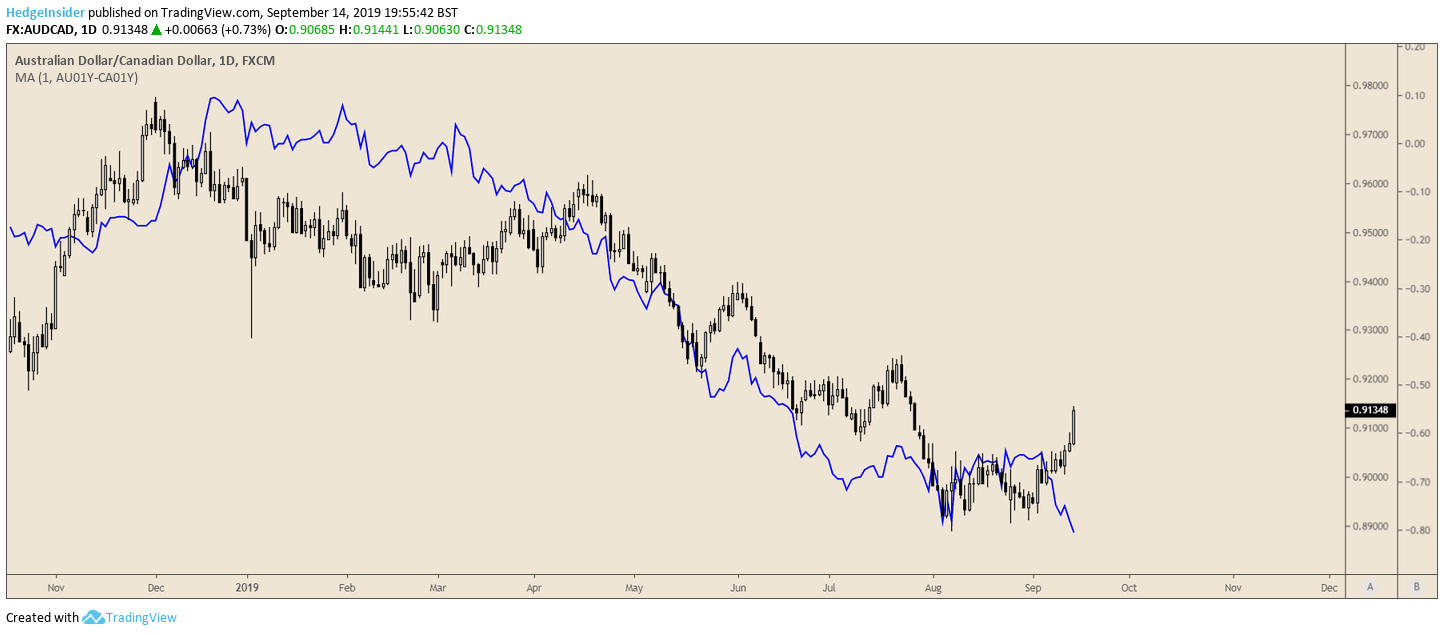
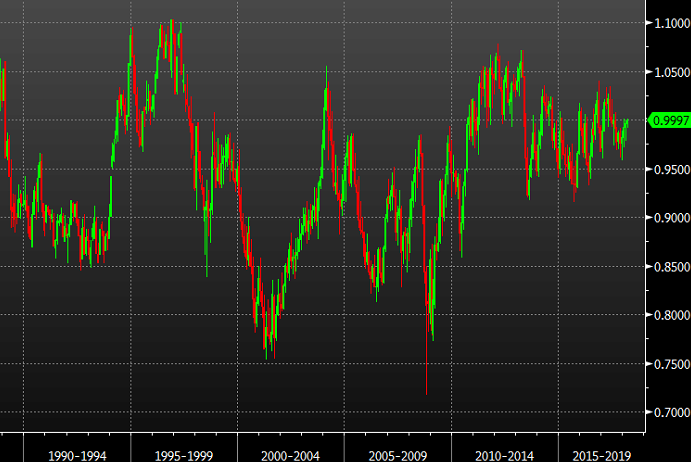
Aud Cad Chart Aud Cad Breaks Parity To Touch Highest Since August.
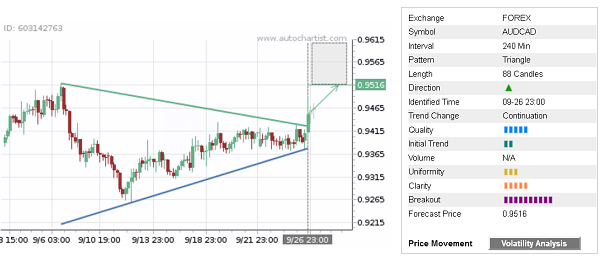
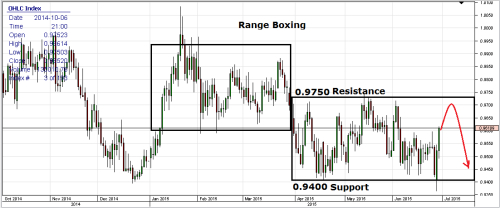
Aud Cad Chart Audcad Chart Analysis Show A Lot Of Potential Today.
Aud Cad ChartAud Cad Chart Gold, White, Black, Red, Blue, Beige, Grey, Price, Rose, Orange, Purple, Green, Yellow, Cyan, Bordeaux, pink, Indigo, Brown, Silver,Electronics, Video Games, Computers, Cell Phones, Toys, Games, Apparel, Accessories, Shoes, Jewelry, Watches, Office Products, Sports & Outdoors, Sporting Goods, Baby Products, Health, Personal Care, Beauty, Home, Garden, Bed & Bath, Furniture, Tools, Hardware, Vacuums, Outdoor Living, Automotive Parts, Pet Supplies, Broadband, DSL, Books, Book Store, Magazine, Subscription, Music, CDs, DVDs, Videos,Online Shopping